How to Set Up Motion Detection and Motion Alerts on the SureVision NVR

CCTV SECURITY PROS EXPERT GUIDE

HOW TO SET UP MOTION DETECTION & MOTION ALERTS ON A SUREVISION NVR

Easy step-by-step setup for motion recording, mobile alerts, and smarter event monitoring

Learn how to enable motion-based recording on your SureVision NVR and turn on mobile alerts so you can save storage space, search events faster, and stay informed when activity matters most.

Motion Recording Mobile Alerts SureVision NVR Setup
SureVision NVR Motion Setup Guide
SureVision NVR motion detection and motion alerts guide
QUICK ANSWER

Set Up Motion Recording and Alerts in Minutes

To set up motion detection on a SureVision NVR, open the recorder menu from Live View, go to Storage, confirm Enable Schedule is checked, switch to the Motion tab, fill the schedule grid, then copy and apply it to the cameras you want. To set up motion alerts, open the SureVision app, go to Alarm Notifications, enable notifications for your device, then fine-tune which cameras, times, and alert types you want to use.

Why Motion Detection and Motion Alerts Matter

Motion-based recording helps your system focus on the footage that matters most. Instead of reviewing long stretches of uneventful video, motion events are easier to locate and review. Motion alerts add another layer of convenience by notifying your phone or tablet when selected cameras detect activity.

PERFECT FOR HIGH-PRIORITY AREAS
Front doors, gates, loading areas, side entrances, storage rooms, driveways, and other spots where faster review and faster notification matter most.
1

Open the SureVision NVR Motion Recording Schedule

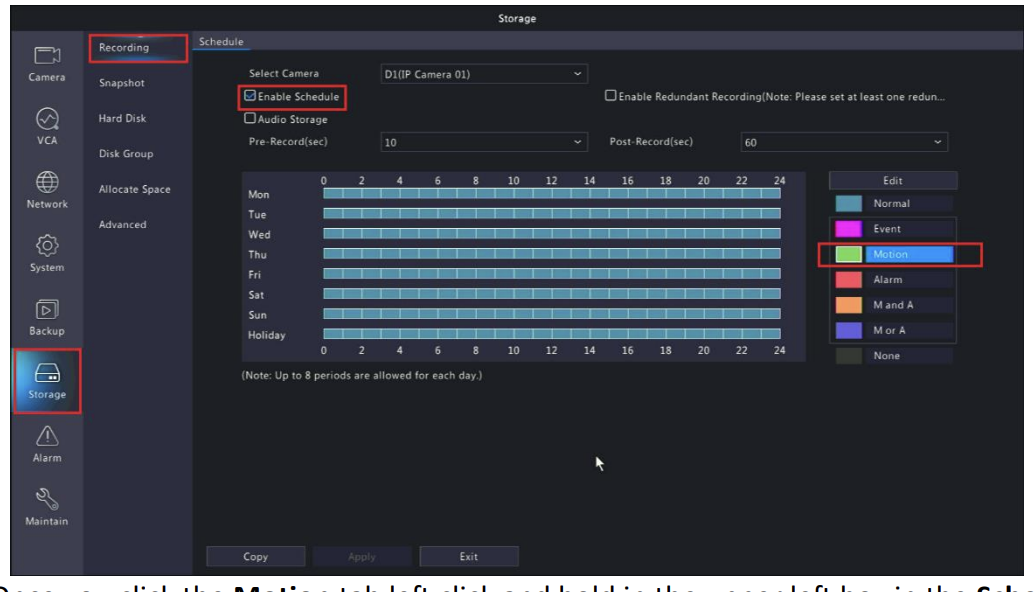
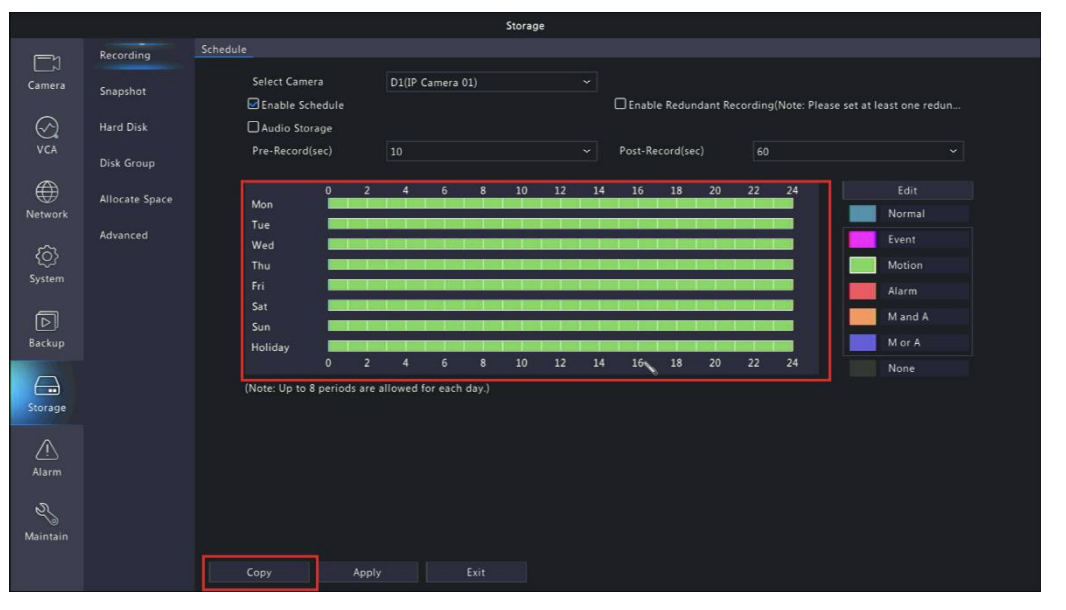
Start from Live View, right click, and open Menu. After logging in, click the Storage tab. Make sure Enable Schedule is checked, then click the Motion tab.

SureVision NVR storage screen with enable schedule and motion tab
Add your screenshot here: Storage screen with Enable Schedule checked and the Motion tab selected.
2

Fill the Motion Schedule

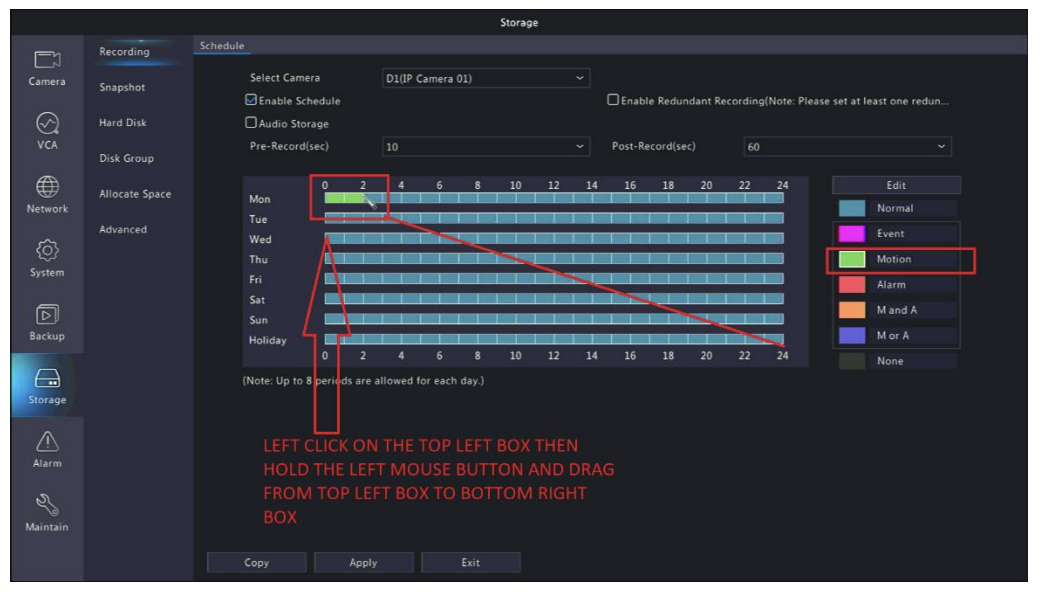
Once you are on the Motion tab, click and hold in the upper-left box of the schedule grid, then drag down to the lower-right box. When the schedule is filled correctly, the selected motion schedule should turn green.

EXPERT TIP
Fill the full grid for all-day motion recording, or fill only the hours you want, such as evenings, overnight, or weekends.
Dragging across the motion schedule grid on a SureVision NVR
Add your screenshot here: dragging across the schedule grid.
Green motion schedule on a SureVision NVR
Add your screenshot here: completed motion schedule highlighted in green.
3

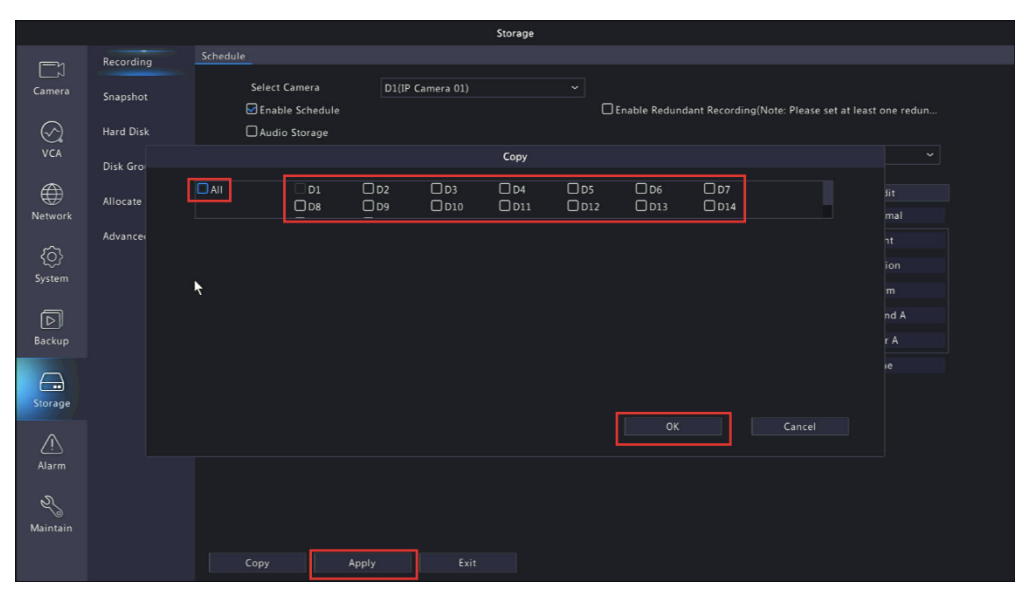
Copy the Schedule to All Cameras or Selected Cameras

After the motion schedule is set, click Copy. You can apply the schedule to All Cameras or only to selected channels. Then click OK and click Apply.

SureVision NVR copy motion schedule screen with all cameras option and apply button
Add your screenshot here: Copy screen with channel selection, OK, and Apply.
4

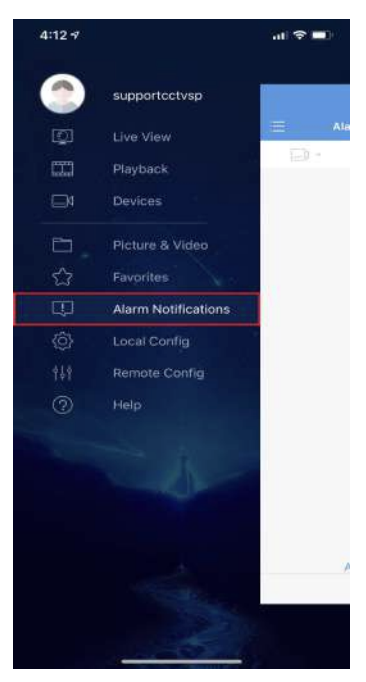
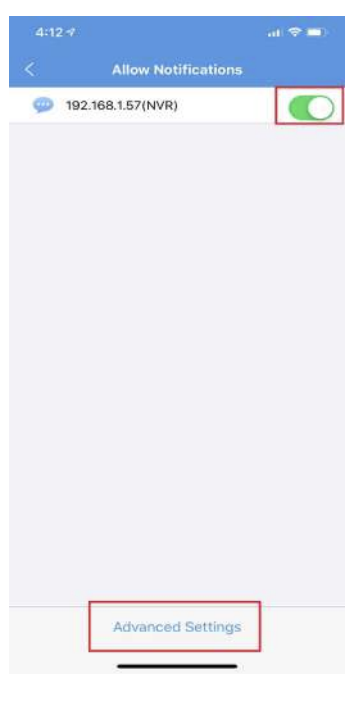
Open Alarm Notifications in the SureVision App

To receive motion alerts on your phone or tablet, open the SureVision app and tap the menu button at the top left. Then select Alarm Notifications.

SureVision app menu with alarm notifications option
Add your screenshot here: app menu with Alarm Notifications.
Allow notifications screen in the SureVision app
Add your screenshot here: Allow Notifications screen.
5

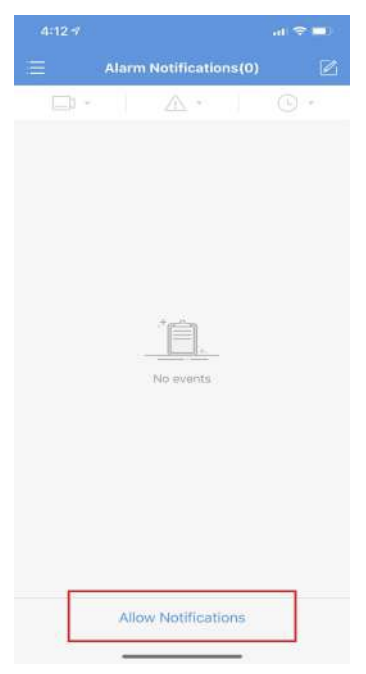
Enable Notifications for Your Device

Tap the button next to your device name. When the button is green, alarms are enabled. If it is gray, alarms are disabled.

SureVision app notifications enabled with green toggle
Add your screenshot here: green notification toggle and Advanced Settings area.
6

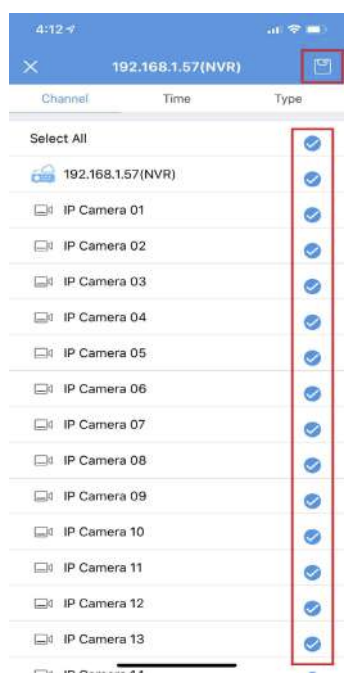
Choose Which Cameras Send Alerts

Inside Advanced Settings, you can enable or disable motion alerts by camera. Cameras with the blue check box will send alerts. Remove the check box from cameras you do not want included.

PROFESSIONAL RECOMMENDATION
Start with front doors, gates, receiving areas, and other priority zones so your alerts stay useful and not overwhelming.
SureVision advanced settings with camera check boxes
Add your screenshot here: camera selection screen with blue check boxes.
7

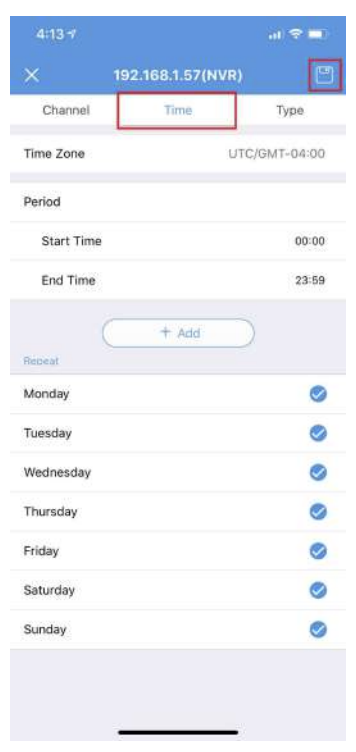
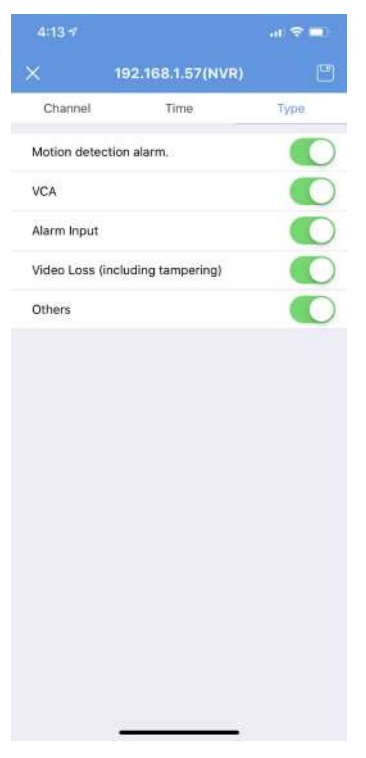
Set Alert Times and Choose Alert Types

In the SureVision app, the Time tab lets you schedule when alerts are delivered. The Type section lets you choose which alarm events generate notifications.

SureVision app time tab for scheduling alerts
Add your screenshot here: Time tab for scheduling alerts.
SureVision app type settings for motion alert options
Add your screenshot here: Type settings for motion-related alert options.

Best Practices for Better Motion Performance

USE MOTION WHERE IT MATTERS MOST
Focus on entrances, gates, and important activity zones.
AVOID TOO MANY ALERTS
Choose only the cameras that truly matter for notifications.
SCHEDULE AFTER-HOURS ALERTS
Overnight and after-hours schedules usually make alerts more useful.
SAVE CHANGES BEFORE EXITING
Make sure all NVR and app settings are saved before leaving the screen.

Frequently Asked Questions

Do SureVision systems record 24/7 by default?
Yes. SureVision systems are designed to record continuously out of the box.
Does motion recording help save hard drive space?
Yes. Motion-based recording can help save storage space and make event searches easier.
Do I need remote viewing before using motion alerts?
Yes. Remote viewing should be configured first before enabling motion alerts in the app.
Can I choose which cameras send motion alerts?
Yes. You can enable or disable alerts by camera inside Advanced Settings.
Can I schedule when alerts are delivered?
Yes. The Time tab lets you control when alerts are sent.
NEED A PROFESSIONAL NVR THAT’S EASY TO CONFIGURE?
CCTV Security Pros offers professional-grade SureVision NVRs, expert support, and easy-to-follow setup resources to help you get more from your security system.
SINCE 2008 • NO MONTHLY FEES • MONEY-BACK GUARANTEE • LIFETIME SUPPORT