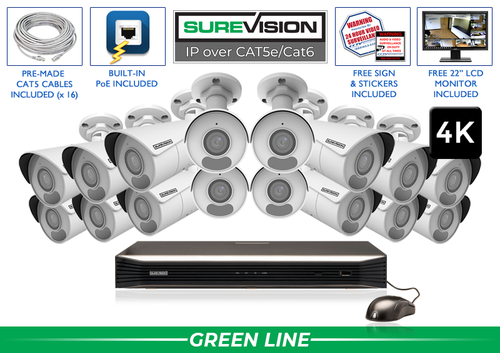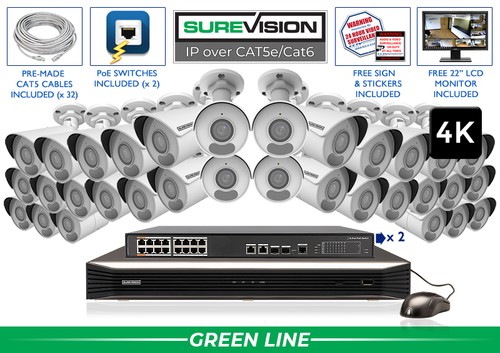
Professional property surveillance since 2008 Connect entrances, customer areas, deliveries and controlled access with professional wired cameras, local NVR recording and a clear review process. A dispensary camera plan should turn the approved security layout into useful recorded views. Start with the entrances, customer routes, counter activity, receiving points and controlled areas the business needs to review. Give each view one clear job, then choose cameras, recorder capacity and storage around that plan. Professional equipment works best when the setup and daily review process are planned together. Complete 4K camera systems Start with a value-focused SureVision 4K PoE kit, then match the camera positions to your layout. These complete systems bring cameras, local recording, storage and camera cables together. Choose cable lengths and storage for the job when ordering. Need different camera styles or a tighter view? Our team can help customize the kit around your business. Bring the business’s responsible security lead into the planning walk. Mark the approved locations and the recording requirements the project must meet before ordering equipment. Turn those into a camera schedule: location, purpose, subject distance, recording schedule and the person who will accept the finished view. Trace an arrival, a counter interaction and a delivery across the proposed cameras. Each should form an understandable sequence. Supply any licensing-related system requirements to the quotation team so the proposed models, storage and installation plan can be checked against the project brief before purchase. An entrance camera can show an approach and passage through the doorway. A customer-area view can explain movement toward the counter or through the sales floor. Plan both around how the store operates with displays, queues and staff in their normal positions, rather than treating an empty-room image as the finished result. Record a representative arrival and follow the sequence in playback. Check bright windows, open doors and people passing together. If a display or corner breaks the route, adjust the position or add a separate view. Keep the framing focused on the approved camera job and have the responsible manager approve audio and viewing settings. Next step: Record a normal test event and review the saved result before final mounting. An overview can explain movement without showing the detail needed at a selected counter or delivery position. Define whether each camera should show an approach, an interaction or a handoff. Use the actual working area when testing, including the staff position and the items or carts that ordinarily fill the scene. For receiving, connect the service entrance with the approved staging and handoff area. Review a test delivery from arrival to departure. For a counter view, check that ordinary staff positions do not hide the intended activity. Align recorder time with business records so a known event time helps narrow a search. The featured 4K kits use fixed 2.8mm bullet cameras for wide-angle scenes. Match the mounting point to the useful distance and check recorded detail where the important activity actually happens. A larger image resolution helps most when the lens and position put enough of the subject into the picture. Choose a motorized varifocal camera when a selected entry, service approach or approved counter location needs finer optical framing. A PTZ can support active observation outside while fixed cameras maintain the important routes. Test exterior movement after dark with signs, headlights and normal site lighting in their ordinary state. Build one equipment list covering recorder channels, storage, cameras, Ethernet cable lengths, mounts and any separate PoE switches. A compatible PoE connection carries power and video over one cable per camera. Check powered connections and switch power capacity separately from the recorder’s channel count. Use individual authorized accounts and assign responsibility for playback, exports, account recovery and configuration changes. Keep the recorder in an appropriate secured location. Set supported alerts for defined areas and hours, then verify a real event. Include routine checks of image clarity, timestamps, recording history and exported video in the operating handover. Next step: List the events, responsible users and notification hours, then test recording and alerts separately. Use the project’s approved retention and recording requirements as the storage target. Supply the camera count and recording schedule when requesting a quote, then verify the available history during representative operation. Camera count, video settings, activity and the recording schedule affect retention. Count planned views and near-term additions before choosing recorder capacity. Check PoE ports and any separate switches as well as the channel count. Use the recording storage calculator, then confirm the history after the system has operated normally. SureVision systems combine local NVR recording with a free viewing app and no required monthly viewing fees. Internet at the property supports access from outside the site. A properly configured local camera network can record independently of that internet connection. Record an entrance arrival, an approved counter interaction and a delivery handoff. Have an authorized manager find and export the relevant sequences, then check that the completed setup matches the approved project brief. Check remote access using cellular data, review recorded footage and open an exported clip on another device. Leave the owner with the account and recovery information needed to manage the system. Count distinct coverage jobs before choosing a kit size. A small defined zone may use only a few cameras, while a complete property can need separate customer-area, counter, receiving, restricted-access and exterior views. Compare the featured 4, 8, 16 and 32-camera examples with the full 2-to-64-camera range below. For a new wired installation, start with matched SureVision IP cameras and an NVR. Choose storage, cable lengths, mounting accessories and powered connections together. CCTV Security Pros has supplied professional surveillance equipment since 2008, with a 3-year limited warranty and unlimited USA support for SureVision. Share a layout and your recording-history target for help selecting a complete system. Continue with the lens guide, PoE installation guide and recording storage calculator. Send your layout, important camera jobs and recording-history target. Our team can help match a complete system to the property.Dispensary Security Camera Systems: Plan Useful Views Across the Property
Popular Business Systems
In this guide
1. Begin with the approved coverage and recording requirements
A practical coverage plan
Area
Camera job
Check during setup
Main entrance
Arrival and movement through the approved entry route
Check doorway glare, open doors and ordinary customer traffic.
Customer area
Movement through the sales floor and toward the counter
Test displays, queues and staff positions.
Counter approach
Context for an approved transaction-area view
Check normal handling positions and avoid unnecessary screen detail.
Receiving point
Delivery arrival, staging and handoff
Test carts, cartons and open service doors.
Controlled access
Movement through an approved restricted doorway
Check the approach, door swing and related access route.
2. Connect entry and customer-area recordings
3. Give counter and receiving activity a clear frame
4. Select wide-angle and adjustable cameras by job
5. Plan installation, permissions and daily checks
6. Choose NVR channels and recording history
7. Use free remote viewing and test the full workflow
8. Build a complete system around your layout
Look for the logo, expect the quality.Plan your dispensary camera system with the Pros
Free Viewing AppNo Monthly Viewing Fees3-Year WarrantyUnlimited USA Support