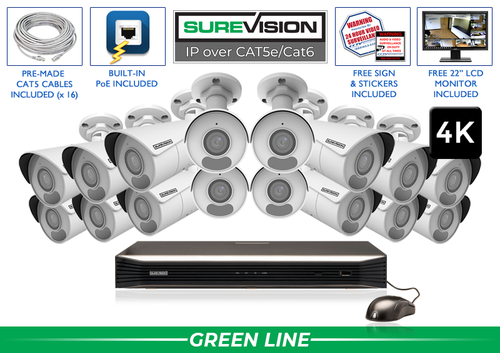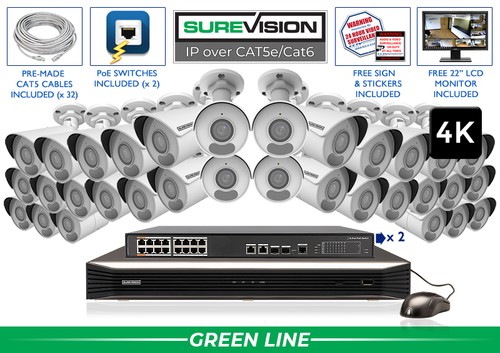
Professional property surveillance since 2008 Connect public entrances, staff access, vehicle yards and local recording with a professional camera plan your team can operate confidently. A public facility camera plan starts with the work of the property. Visitors arrive for services, employees move between controlled areas and crews use vehicles and equipment throughout the day. Give each camera a defined job, then choose a complete system that helps authorized staff review those activities with useful recorded detail. Complete 4K camera systems Start with a value-focused SureVision 4K PoE kit, then match the camera positions to your layout. These complete systems bring cameras, local recording, storage and camera cables together. Choose cable lengths and storage for the job when ordering. Need different camera styles or a tighter view? Our team can help customize the kit around your business. Mark the public entrance, lobby, service counter, staff access points, deliveries and vehicle areas on a simple site plan. For each position, write one sentence describing what staff should be able to review. An entrance view might explain an arrival; a yard view might explain the route of a service vehicle. Walk the plan with someone who operates the building. Include early opening, closing and after-hours maintenance. A camera schedule turns a general request for coverage into a practical equipment list, with a clear reason for each view and fewer surprises during installation. A lobby overview helps connect movement between the entrance and service area. A closer counter view can provide context for an interaction. Frame those jobs deliberately so the camera shows the relevant activity without collecting unnecessary detail from desk screens, paperwork or adjoining workspaces. Test a normal visitor arrival, a queue and a staff member opening a controlled door. Review the recordings rather than judging only the live picture. Have the facility owner approve the final framing and audio settings under the organization’s policies before completing setup. Next step: Record a normal test event and review the saved result before final mounting. Start with the gate, the vehicle route, the normal parking or staging area and the equipment handoff. Park representative trucks where they would sit during a working shift. Tall vehicles, equipment racks and open garage doors can divide one broad scene into several separate coverage jobs. Keep a fixed view on an important route. A PTZ can add operator-controlled observation across a larger yard, while a motorized varifocal camera can refine a selected gate or loading position. If readable plates are a project requirement, specify the lane and plan suitable specialty equipment for that task. The fixed 2.8mm cameras in the featured 4K kits provide wide-angle coverage for a defined scene. Choose the mounting point with the target distance in mind. A subject that is very small in a broad picture may need a closer position or a narrower optical view. Use the motorized lens option below when setup calls for more adjustable framing. Check a person and a vehicle at the real operating distance, then inspect saved video in daylight and after dark. Finish with a camera name that identifies the actual location, such as North Public Entrance or Fleet Gate. List cameras, recorder channels, storage, cable routes, mounting accessories and any separate PoE switches as one project. PoE carries power and video over a compatible Ethernet cable. Check the number of powered connections and the switch power budget alongside recorder channel capacity. Bring any NDAA-related purchasing requirements, required documentation and approved-equipment rules to the quotation stage. Match those requirements to the exact proposed models with the responsible purchasing team. Assign an owner for access permissions, recorder location, software maintenance and the final acceptance test. Next step: List the events, responsible users and notification hours, then test recording and alerts separately. Set the recording-history target with the team that handles incident reports, facility closures and footage requests. Size storage around the approved operating schedule and confirm the oldest available recordings after normal use. Camera count, video settings, activity and the recording schedule affect retention. Count planned views and near-term additions before choosing recorder capacity. Check PoE ports and any separate switches as well as the channel count. Use the recording storage calculator, then confirm the history after the system has operated normally. SureVision systems combine local NVR recording with a free viewing app and no required monthly viewing fees. Internet at the property supports access from outside the site. A properly configured local camera network can record independently of that internet connection. Record a visitor arrival, a controlled-door event and a vehicle handoff. Have an authorized facility user find the correct time, follow the sequence and export the relevant clip. Check remote access using cellular data, review recorded footage and open an exported clip on another device. Leave the owner with the account and recovery information needed to manage the system. A small service office may begin with four distinct jobs: entrance, lobby, controlled staff door and rear access. Larger public buildings and fleet facilities need additional views for separate doors, yards and buildings. Compare the 4, 8, 16 and 32-camera examples, then use the full 2-to-64-camera range below to match the actual plan. For a new wired installation, start with matched SureVision IP cameras and an NVR. Choose storage, cable lengths, mounting accessories and powered connections together. CCTV Security Pros has supplied professional surveillance equipment since 2008, with a 3-year limited warranty and unlimited USA support for SureVision. Share a layout and your recording-history target for help selecting a complete system. Continue with the lens guide, PoE installation guide and recording storage calculator. Send your layout, important camera jobs and recording-history target. Our team can help match a complete system to the property.Government Security Camera Systems: Plan Clear Coverage for Public Facilities
Popular Business Systems
In this guide
1. Write a camera schedule around public service
A practical coverage plan
Area
Camera job
Check during setup
Public entrance
Arrival and movement through the doorway
Test open doors, daylight and normal visitor traffic.
Lobby and service counter
The approach, queue and service interaction
Keep screens and documents outside the intended framing.
Staff-only access
Movement through a selected controlled doorway
Check door swings and the approach on both sides.
Fleet yard or equipment area
Vehicle routes and equipment handoffs
Test with parked trucks and ordinary staging positions.
Delivery or maintenance access
Arrivals, unloading and departure
Check after-dark lighting and stacked materials.
2. Give public counters and controlled doors different views
3. Follow vehicles and equipment through the yard
4. Match lenses to the detail needed at each location
5. Prepare the equipment list for installation and purchasing
6. Choose NVR channels and recording history
7. Use free remote viewing and test the full workflow
8. Build a complete system around your layout
Look for the logo, expect the quality.Plan your government camera system with the Pros
Free Viewing AppNo Monthly Viewing Fees3-Year WarrantyUnlimited USA Support