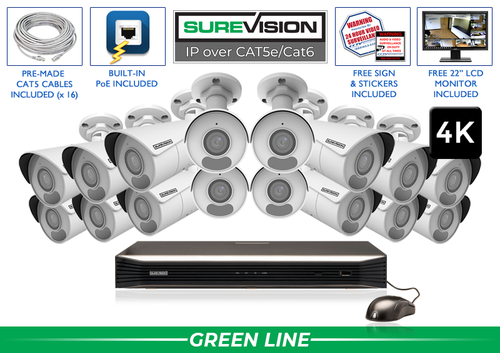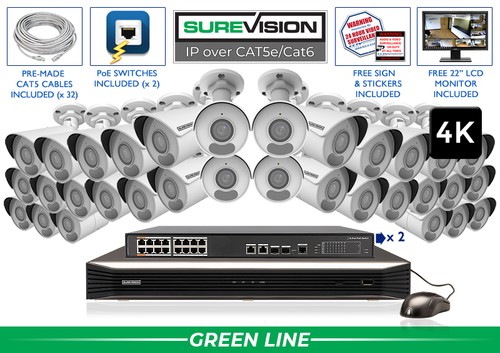
Professional retail surveillance since 2008 Cover entrances, transactions, inventory and deliveries with professional wired cameras and recordings you know how to use. You worked hard to build your store. A useful camera system helps you understand what happens across the sales floor, at the counter and behind the scenes. Begin with the events you may need to review, then choose camera views that answer those questions. Complete 4K camera systems Start with a value-focused SureVision 4K PoE kit, then match the camera positions to your layout. These complete systems bring cameras, local recording, storage and camera cables together. Choose cable lengths and storage for the job when ordering. Need different camera styles or a tighter view? Our team can help customize the kit around your business. A camera at the front door can help connect a person with an arrival time. A sales-floor overview can explain movement between aisles. A closer view at a priority display can show activity that a ceiling-wide view might miss. Give these cameras separate jobs. Walk the store as a customer and as an employee carrying a delivery. Note where shelves, doors and seasonal displays hide the route. Plan the views around the store as it operates, rather than an empty floor plan. Check the layout again when merchandising changes. At a register, the question is often what happened during an interaction. Frame the counter, the people involved and the relevant handling area. Avoid a view so close that the surrounding sequence disappears, or so high that people and hands hide everything important. Use a normal test transaction to evaluate the result. Review the saved footage, including the approach to the counter and departure. Match the recorder clock to your business records so a known transaction time helps narrow the search. A camera view does not by itself provide integration with POS data. Next step: Test a normal activity sequence in the proposed view before final mounting. Receiving and stockroom views help trace product movement. Cover where goods are staged as well as the door they pass through. When an item is missing, a useful sequence shows its arrival, storage and movement toward the sales floor. Give high-value stock a deliberate view and check that the scene remains useful when cartons are stacked normally. If tall storage blocks the image, change the position or add a second view. Keep employee-only access points clear in the camera plan without extending surveillance into private spaces. A wide camera can show movement across an aisle or room. A motorized varifocal camera lets you refine the framing around a particular display, door or counter from supported controls. Put the selected subject at a useful size in the image before relying on digital enlargement. The SureVision SV-BV4-N is one motorized option, with a 2.8–12mm lens, microphone and PoE connection. Use it where adjustable framing solves a specific placement problem. Select the camera housing and mounting position to suit the actual store area. Front and rear approaches can look very different after the lights change. Check glare from windows, reflections from nearby surfaces and the view of someone approaching the door. An exterior overview may need a separate closer view at the access point. Where appropriate, supported human detection can focus notifications on a closed delivery area. Active deterrence cameras can add configured warning lights, voice messages or sirens. Define the relevant area and hours, then test authorized arrivals and the activity you want to know about. Next step: Write down the event, area and hours you want to monitor, then test recording and alerts separately. Consider how long it takes to notice a stock discrepancy, return issue or delivery problem. Include closed days when choosing the recording history you want. Camera count, scene activity, resolution and recording settings all affect the result. Continuous recording keeps context before and after activity, while supported event search helps locate useful moments. Count the camera jobs you need now and the additions already planned. Choose enough recorder channels for that list, then check built-in PoE ports and any separate switch requirements. A spare recording channel and a spare powered camera connection describe different things. An 8-channel SureVision NVR with 4TB is one starting option when the full camera plan fits that capacity. Larger plans need an appropriately sized recorder. Use the storage calculator while planning and confirm actual recording history once the system has operated normally. SureVision provides a free viewing app with no required monthly viewing fees. Check the property using the appropriate app and supported playback. Internet service at the site provides off-site access; a properly configured local camera network can record independently of that internet connection. Test viewing from cellular data rather than only the property Wi-Fi. Give authorized users the access they need for their role and protect accounts with unique passwords. Keep recovery information available to the owner. Test an arrival, a counter interaction and a receiving event. Find each in playback and export a sample with the surrounding context. Open exported video on another device. A working live picture is only part of the handover; the owner should also know how to find footage and preserve an important sequence. For a small store, list the front approach, checkout, main sales area and receiving door as four possible camera jobs. Add a stockroom or second aisle view if those jobs are not visible. This is a planning example; the layout determines the count, not the label “small store.” For a new wired installation, we recommend matched SureVision IP cameras and an NVR. One compatible PoE connection per camera carries power, video and supported audio. Choose the cameras, recorder, storage and cable lengths together. CCTV Security Pros has supplied professional surveillance equipment since 2008. SureVision is available exclusively through CCTV Security Pros and backed by a 3-year limited warranty and unlimited USA support. Share a simple layout, camera locations and recording-history target so our team can help with a complete plan. Continue planning with the lens guide, PoE installation guide and recording storage calculator. Send your layout and priorities. We will help match professional cameras, recording, storage and accessories to the job.Retail Security Camera Systems: Protect Your Store With a Clear Plan
Popular Business Systems
In this guide
1. Start with the route through your store
A practical coverage plan
Area
What the view should show
Check during setup
Entrance
A useful approach view plus movement through the door
Check faces against daylight through the storefront.
Checkout
Counter activity and the customer interaction
Test with a normal transaction and an actual person at the counter.
Sales floor
Aisles, displays and routes through the store
Check for shelf and promotional-display obstructions.
Receiving
Door access, delivery staging and stock movement
Keep the delivery route visible before products enter storage.
Exterior
Rear access and customer or staff approaches
Review the picture after closing under normal lighting.
2. Make checkout footage useful
3. Follow stock from delivery to display
4. Choose lenses for the views you need
5. Plan for closing time and exterior access
6. Choose NVR capacity and recording history
7. Use the free app and prove the recording works
8. Turn your layout into a complete equipment list
Look for the logo, expect the quality.Build your retail system with the Pros
Free Viewing AppNo Monthly Viewing Fees3-Year WarrantyUnlimited USA Support