


Professional property surveillance since 2008
Gym Security Camera Systems: Connect Check-In, Shared Routes and Facility Access
Give authorized managers useful recorded views of entrances and approved shared areas with professional wired cameras, local storage and free remote viewing.
✓ Free Viewing App ✓ No Monthly Viewing Fees ✓ 3-Year Warranty ✓ Unlimited USA Support
Start a gym camera plan with the member journey: arrive, check in, move through the approved shared areas and leave. Add service doors and deliveries. Give each view a specific job, then test it during ordinary facility use so staff can review a real event confidently.
Complete 4K camera systems
Popular Business Systems
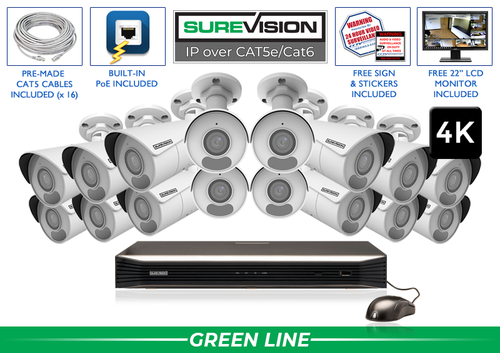
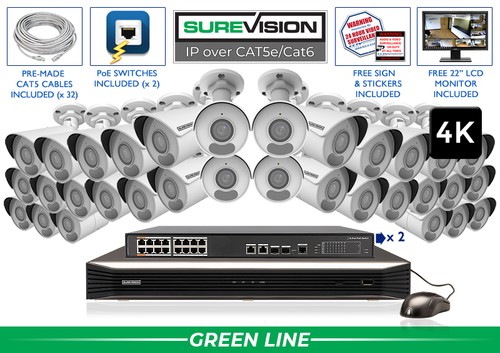
Start with a value-focused SureVision 4K PoE kit, then match the camera positions to your layout. These complete systems bring cameras, local recording, storage and camera cables together.
Choose cable lengths and storage for the job when ordering. Need different camera styles or a tighter view? Our team can help customize the kit around your business.
In this guide
- Popular Business Systems
- Map the facility around check-in and shared movement
- Test reception as an interaction, not an empty room
- Check equipment, mirrors and changing lighting
- Choose a camera for each location
- Plan extended hours, user access and maintenance
- Choose NVR channels and recording history
- Use free remote viewing and test the full workflow
- Build a complete system around your layout
1. Map the facility around check-in and shared movement
Walk the member and staff routes during a normal session. Mark entrances, reception, approved shared-floor routes, corridors and service access. Describe the event each camera should help review, such as a check-in interaction or movement through a selected exterior door.
Choose views with the facility manager and keep cameras out of restrooms, changing rooms and other private spaces. Check framing through nearby doorways as well as the main scene. Plan approved coverage around shared entrances and routes, and give each position a clear location name for recorded searches.
A practical coverage plan
| Area | Camera job | Check during setup |
|---|---|---|
| Main entrance | Arrival and movement toward reception | Test open doors, windows and busy check-in periods. |
| Reception | The check-in interaction and shared approach | Check the view with people at their normal positions. |
| Approved shared floor area | Movement along a defined public route | Check equipment height, mirrors and busy sessions. |
| Parking approach | The route between parking and the entrance | Test vehicles, columns and after-dark lighting. |
| Service door | Deliveries and approved staff access | Test the door swing and normal handoff position. |
2. Test reception as an interaction, not an empty room
An entrance overview can show an arrival while a closer reception view shows the intended check-in interaction. Check both with members and staff in their normal positions. Screens, signs and people standing at the counter can block an angle that looked clear before opening.
Record an arrival, check-in and the route into the approved shared area. Ask a manager to follow that sequence in playback. Align recorder time with the facility’s reference time so a known event is easy to locate. Any requested connection to an access-control or membership system should be verified as a separate integration requirement.
Next step: Record a normal test event and review the saved result before final mounting.
3. Check equipment, mirrors and changing lighting
Exercise equipment, columns and busy classes can divide a large room into several separate views. Test the approved shared routes with the facility in ordinary use. Avoid expecting one wide camera to show close detail across the entire floor.
Check the effect of mirrors, bright windows and changing lights on the saved picture. An exterior-door camera should also be tested after dark with normal parking lights and headlights present. Refine camera position, lens and lighting together where reflections, backlighting or obstructions hide the intended activity.
4. Choose a camera for each location
Dome or turret cameras can suit finished interiors, while bullets can fit selected exterior approaches and service entrances. The featured 4K kits use fixed 2.8mm bullet cameras for wide-angle scenes. Compare the real mounting location and target distance with the detail you want in a recording.
A motorized varifocal camera lets you refine a selected fixed entrance or service view after installation. Test a person at the actual target distance before finalizing the angle. A PTZ may add active observation for a larger approved area, while fixed cameras keep the important access routes recorded.
5. Plan extended hours, user access and maintenance
Assign responsibility for the recorder, individual accounts and recovery information. Decide which authorized users need live viewing, playback, exports or configuration. Keep access appropriate to those responsibilities and show managers how to check that the system is recording.
Configure supported alerts around specific locations and hours. A continuously busy reception and a restricted service door need different notification plans. Confirm who responds during extended or unattended hours. Include camera cleaning, timestamp checks, playback and a sample export in routine facility maintenance.
Next step: List the events, responsible users and notification hours, then test recording and alerts separately.
6. Choose NVR channels and recording history
Set the recording-history target around how long a member or staff report may take to reach management. Include weekends and periods when the responsible reviewer is away.
Camera count, video settings, activity and the recording schedule affect retention. Count planned views and near-term additions before choosing recorder capacity. Check PoE ports and any separate switches as well as the channel count. Use the recording storage calculator, then confirm the history after the system has operated normally.
7. Use free remote viewing and test the full workflow
SureVision systems combine local NVR recording with a free viewing app and no required monthly viewing fees. Internet at the property supports access from outside the site. A properly configured local camera network can record independently of that internet connection.
Record an arrival, a check-in sequence and a service-door event. Have an authorized manager locate the relevant cameras and export a sample clip. Check remote access using cellular data, review recorded footage and open an exported clip on another device. Leave the owner with the account and recovery information needed to manage the system.
8. Build a complete system around your layout
A compact studio may start with four defined jobs around the entrance, reception, an approved shared route and rear access. Larger gyms need additional views around divided floor areas, corridors and parking approaches. Compare 4, 8, 16 and 32-camera systems with the full range below, then select the final kit from the layout.
For a new wired installation, start with matched SureVision IP cameras and an NVR. Choose storage, cable lengths, mounting accessories and powered connections together. CCTV Security Pros has supplied professional surveillance equipment since 2008, with a 3-year limited warranty and unlimited USA support for SureVision. Share a layout and your recording-history target for help selecting a complete system.
Look for the logo, expect the quality.
Continue with the lens guide, PoE installation guide and recording storage calculator.
Plan your gym camera system with the Pros
Send your layout, important camera jobs and recording-history target. Our team can help match a complete system to the property.
888-653-2288