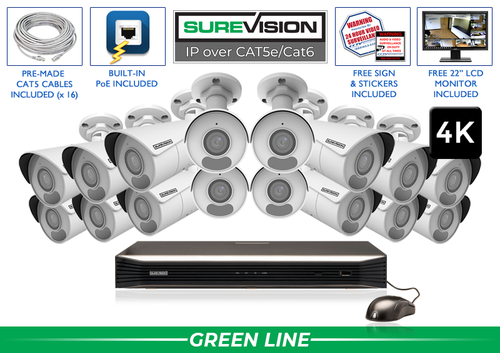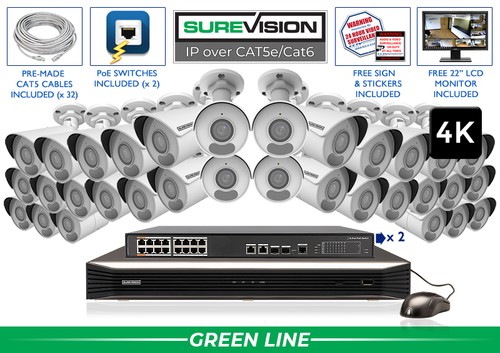
Professional property surveillance since 2008 Plan gates, deliveries, equipment storage and work routes with professional camera systems that fit the site’s power and network layout. A construction site changes as work progresses. Materials arrive, equipment moves and new walls change the sightlines. Begin with the events you need to review and the places where people, vehicles and goods enter or leave. The wired 4K kits below suit sites with suitable power and planned network cable routes; choose the connection design before choosing the camera count. Complete 4K camera systems Start with a value-focused SureVision 4K PoE kit, then match the camera positions to your layout. These complete systems bring cameras, local recording, storage and camera cables together. Choose cable lengths and storage for the job when ordering. Need different camera styles or a tighter view? Our team can help customize the kit around your business. Mark gates, delivery staging, equipment storage, site offices and the routes connecting them. Decide whether each camera should explain broad movement or provide a closer view of an access point. That distinction helps select a lens and position that remain useful when an event needs review. Keep a dated plan showing the current purpose of every camera. A useful view during groundworks may be blocked after materials are stacked or a wall rises. Review coverage when the site layout changes, rather than waiting until a recording is needed to discover that an important route has disappeared. Identify where power, the recorder and any network equipment will sit. Compatible PoE supplies camera power and video over one Ethernet cable per camera. A site with suitable buildings and planned cable routes can use a wired NVR system; another layout may need a different connection design. Measure the real routes to gates, storage areas and detached structures. Share long runs, exposed sections and temporary mounting positions with our team. If the location needs solar or cellular equipment, make that part of the brief from the start. A wired kit alone does not provide an off-grid connection. Next step: Record a normal test event and review the saved result before final mounting. Give the gate a useful arrival view and connect it to the unloading or staging location. A camera that only shows the gate opening may not explain what happened after a vehicle entered. Check the handoff where goods are placed and the route toward the relevant storage area. Use representative vehicles, stacked materials and parked equipment during the test. If these block the target, adjust the position or add a closer view. Give selected valuable assets deliberate access coverage, with enough surrounding context to understand movement before and after an event. Choose the lens around the target distance and scene width. A motorized varifocal camera can refine a gate approach or storage access view after mounting. A PTZ adds active observation, while a fixed camera keeps its assigned area recorded when an operator looks elsewhere. Review saved movement under the site’s normal evening lighting. Check headlights, temporary floodlights, reflective surfaces and shadows around equipment. If readable plates are a requirement, plan a specialty camera for that lane. Do not rely on a wide site overview to deliver every detail at a distance. Use supported detection zones and schedules for the areas you actually need to monitor. Human detection or perimeter tools on selected models can focus attention on a restricted approach. Active deterrence options can add configured warning lights, voice messages or sirens when those functions suit the site plan. Define who receives notifications during work, evenings and weekends. Test routine authorized access as well as the event you want to flag. Inspect mounts, cables and camera windows as part of site maintenance. Recheck alerts and recordings after moving equipment, changing lighting or repositioning a camera. Next step: List the events, responsible users and notification hours, then test recording and alerts separately. Set recording history around delivery reconciliation, inventory checks and the delay between an event and a report. Include weekends and shutdown periods when choosing the storage target. Camera count, video settings, activity and the recording schedule affect retention. Count planned views and near-term additions before choosing recorder capacity. Check PoE ports and any separate switches as well as the channel count. Use the recording storage calculator, then confirm the history after the system has operated normally. SureVision systems combine local NVR recording with a free viewing app and no required monthly viewing fees. Internet at the property supports access from outside the site. A properly configured local camera network can record independently of that internet connection. Test a vehicle arrival, a delivery handoff and an after-hours approach. Find the sequence in playback and export clips that explain the full event. Repeat the coverage check after a major site change. Check remote access using cellular data, review recorded footage and open an exported clip on another device. Leave the owner with the account and recovery information needed to manage the system. For a compact site with suitable wired connections, start by mapping the gate, staging area, equipment access and site-office approach. Add cameras for separate gates, blocked routes or a wider perimeter. Match recorder capacity and network equipment to the current phase and planned changes. For a new wired installation, start with matched SureVision IP cameras and an NVR. Choose storage, cable lengths, mounting accessories and powered connections together. CCTV Security Pros has supplied professional surveillance equipment since 2008, with a 3-year limited warranty and unlimited USA support for SureVision. Share a layout and your recording-history target for help selecting a complete system. Continue with the lens guide, PoE installation guide and recording storage calculator. Send your layout, important camera jobs and recording-history target. Our team can help match a complete system to the property.Construction Site Security Camera Systems: Keep Coverage Useful as the Job Changes
Popular Business Systems
In this guide
1. Choose camera jobs for the current construction phase
A practical coverage plan
Area
Camera job
Check during setup
Site gate
Vehicle arrival, entry and departure
Test with the normal gate position and a real vehicle.
Delivery staging
The handoff and movement into storage
Check stacked materials and changing unloading locations.
Equipment storage
Access and movement around selected assets
Check the view with equipment parked normally.
Site office
Approach and access to the office
Test both normal working hours and the evening view.
Perimeter approach
Movement through a selected restricted route
Review new obstructions as construction progresses.
2. Prove power and connectivity before ordering
3. Document deliveries and equipment access as a sequence
4. Refine the view and check it after dark
5. Set alerts around the work schedule and maintain the system
6. Choose NVR channels and recording history
7. Use free remote viewing and test the full workflow
8. Build a complete system around your layout
Look for the logo, expect the quality.Plan your construction site camera system with the Pros
Free Viewing AppNo Monthly Viewing Fees3-Year WarrantyUnlimited USA Support