
Quick SureVision Help
Select the problem you are having to jump directly to the appropriate section.
New SureVision System Setup
2. Connect the included mouse.
3. Connect power and start the NVR.
4. Follow the startup wizard.
5. Set language, time zone, date and system time.
6. Configure network settings. DHCP can obtain network information automatically.
7. Create your new administrator password when prompted.
SureVision Password Help
Initial SureVision Login
Username: admin
Initial Password: 123456
The NVR requires the initial password to be changed. Use the new password for future logins.
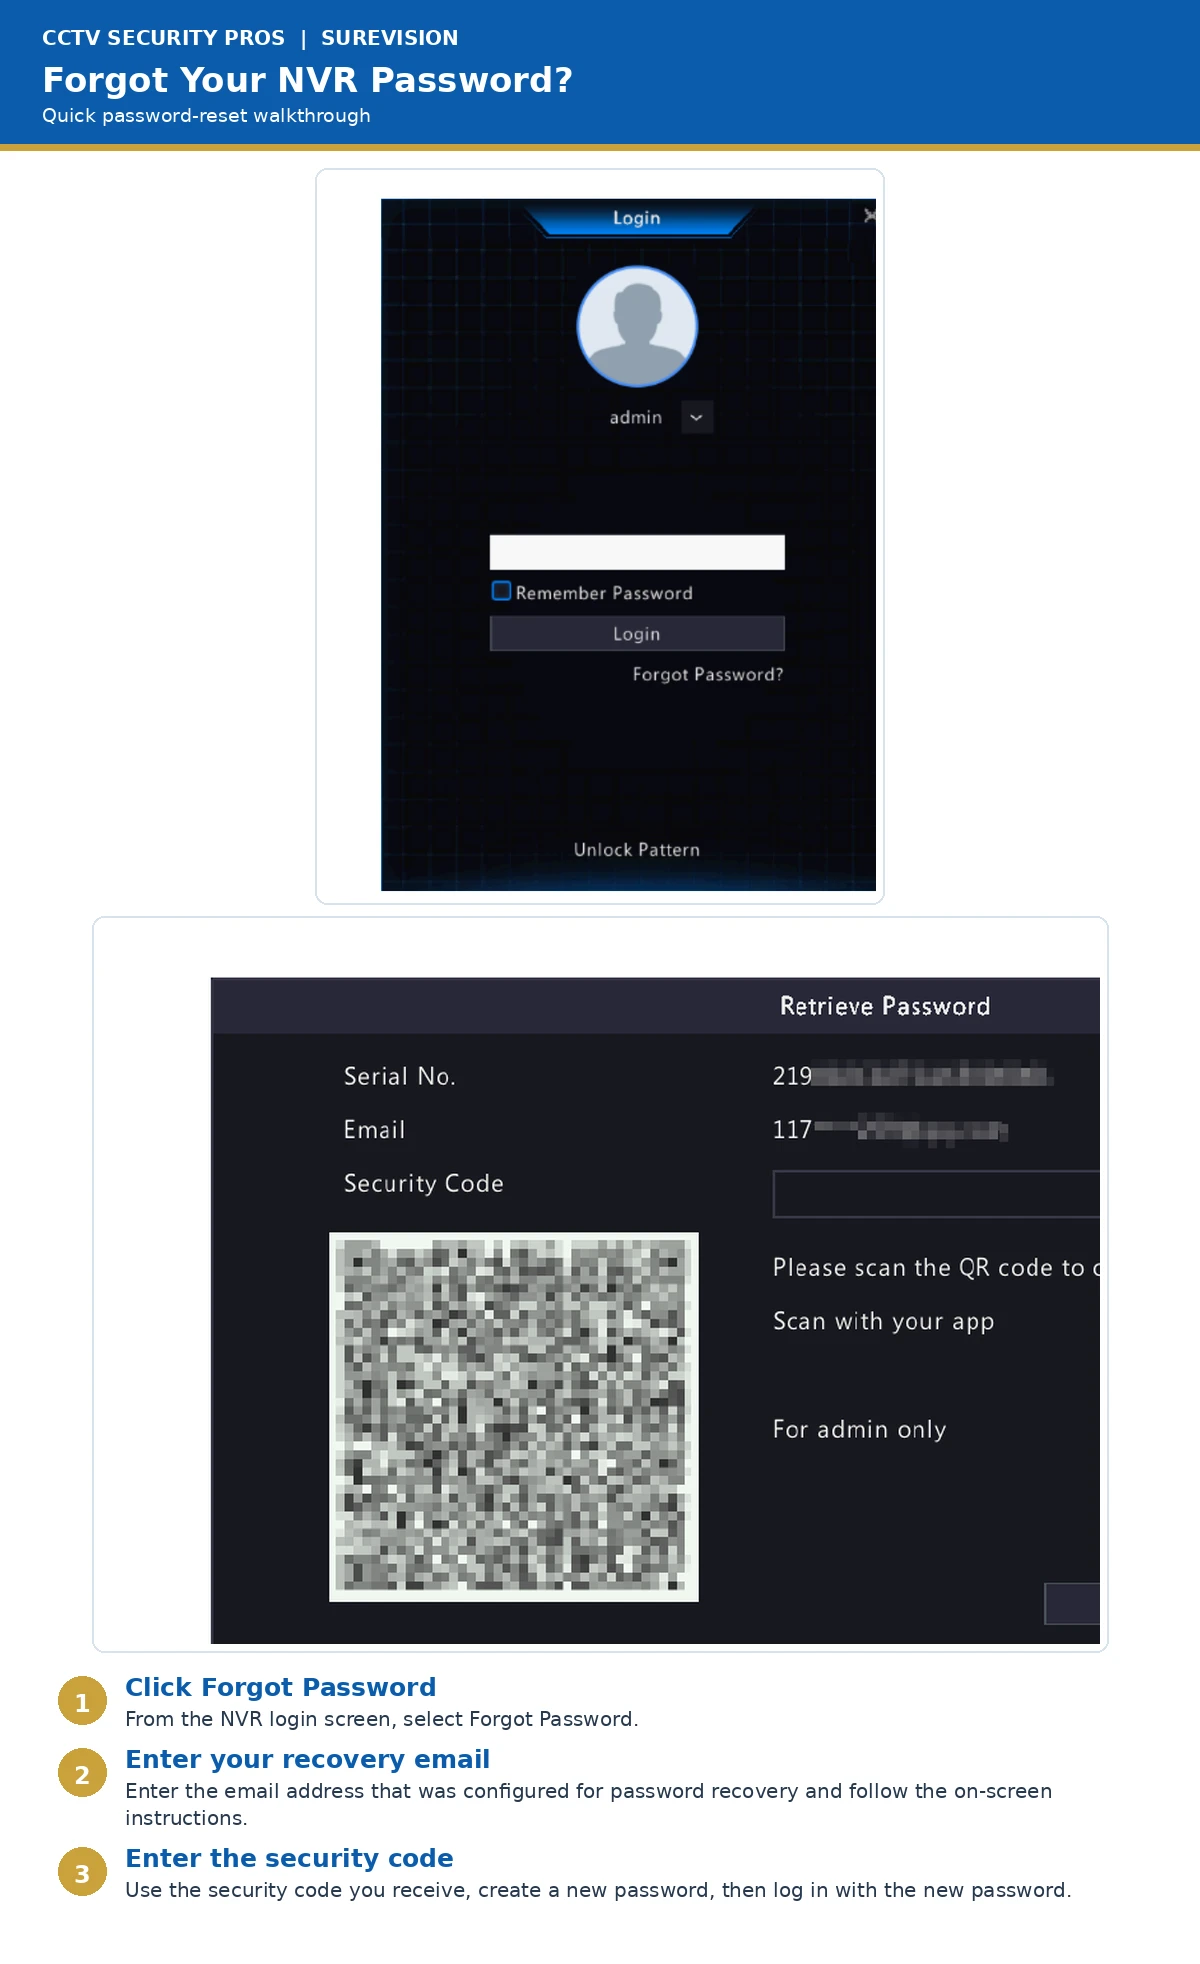
Forgot Your NVR Password?
2. Select Forgot Password.
3. Follow the on-screen recovery instructions.
4. If recovery email was configured, obtain the security code.
5. Enter the code and create a new password.
6. Log in with the new password.
Change an IP Camera Password
Go to Menu → Camera → Camera → Advanced. Select the camera and use the password-change option.
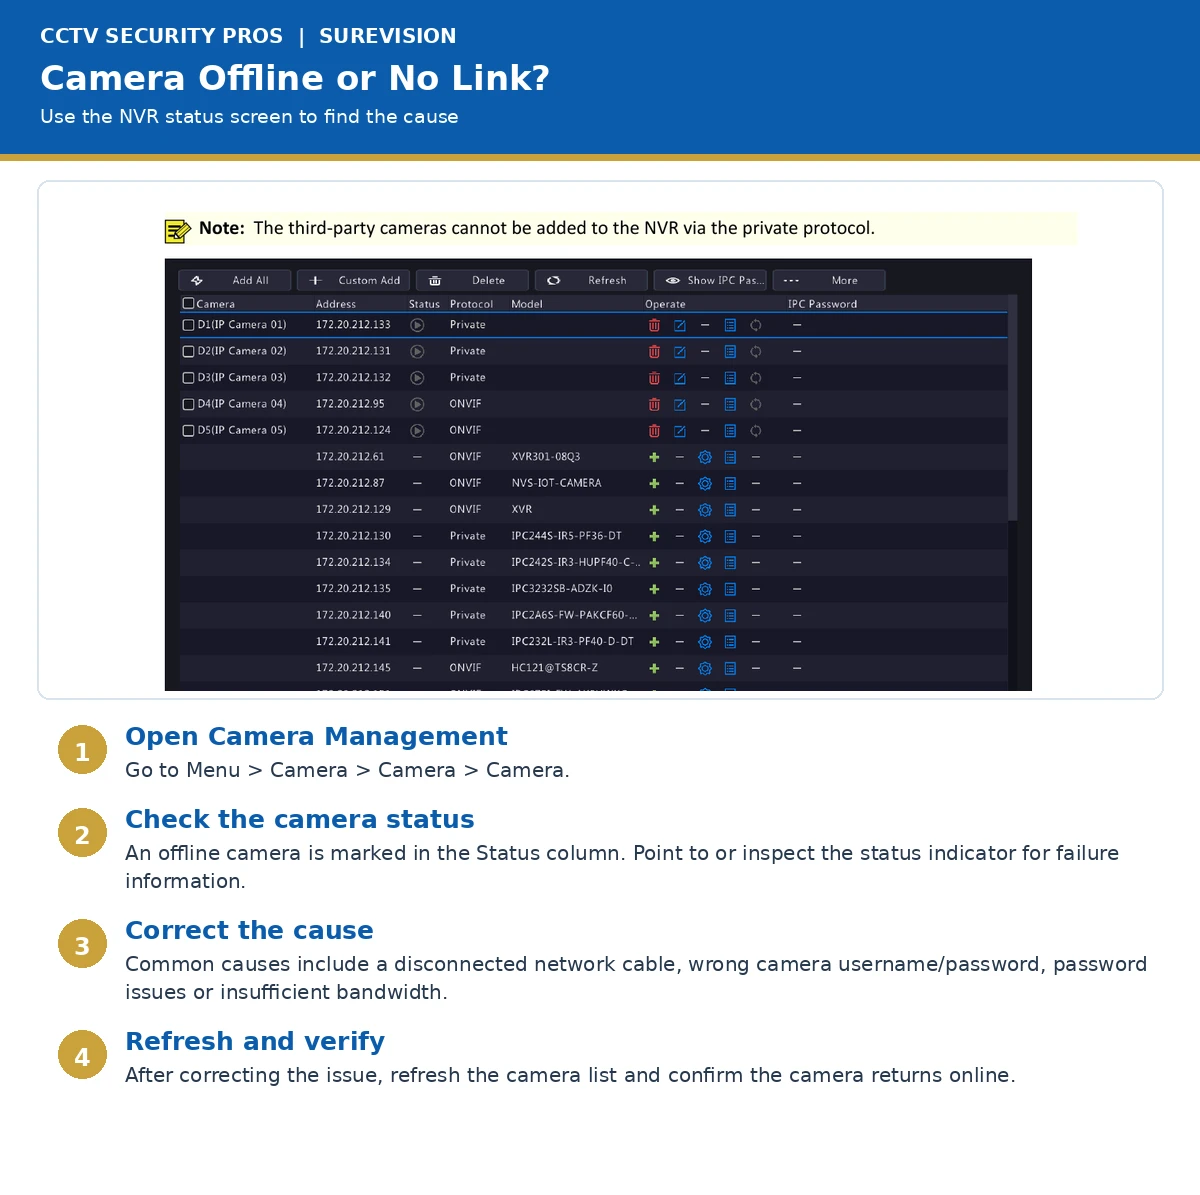
Camera Offline / No Link
To review detailed camera status, go to: Menu → Maintenance → System Info → Camera.
Common causes include a disconnected network connection, incorrect camera username or password, password-security issues or insufficient NVR bandwidth.
The password stored in the NVR must match the camera's current password. Update the camera credentials in the recorder when necessary.
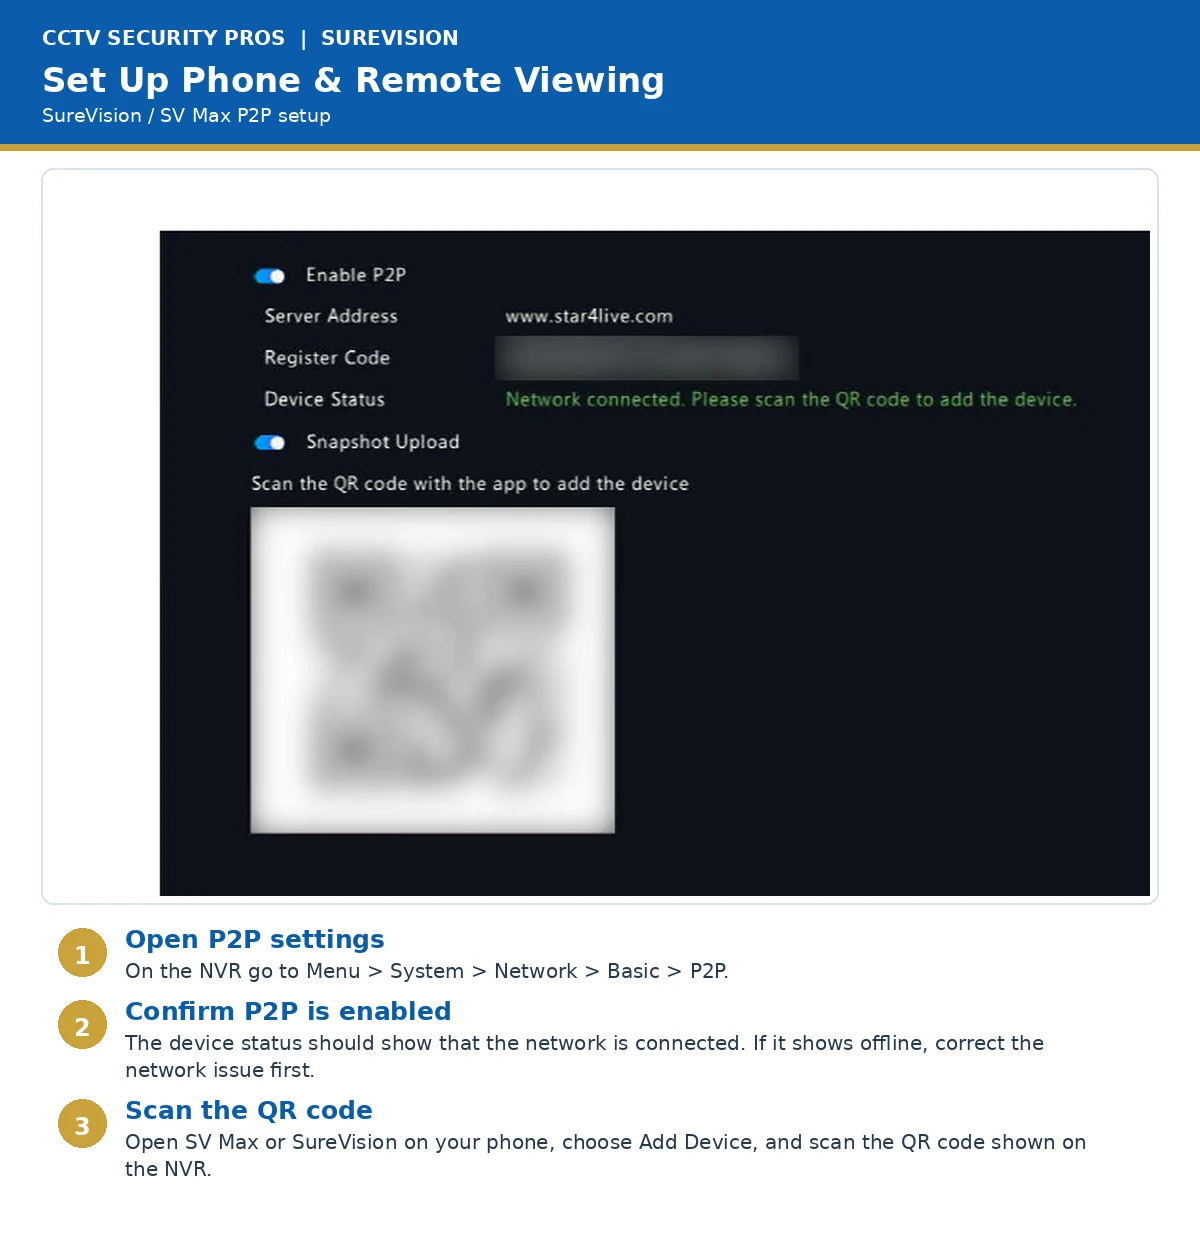
View SureVision Cameras on Your Phone
2. Install and open the app.
3. Add your recorder.
4. Scan the NVR QR code when prompted.
5. Follow the on-screen instructions to complete setup.
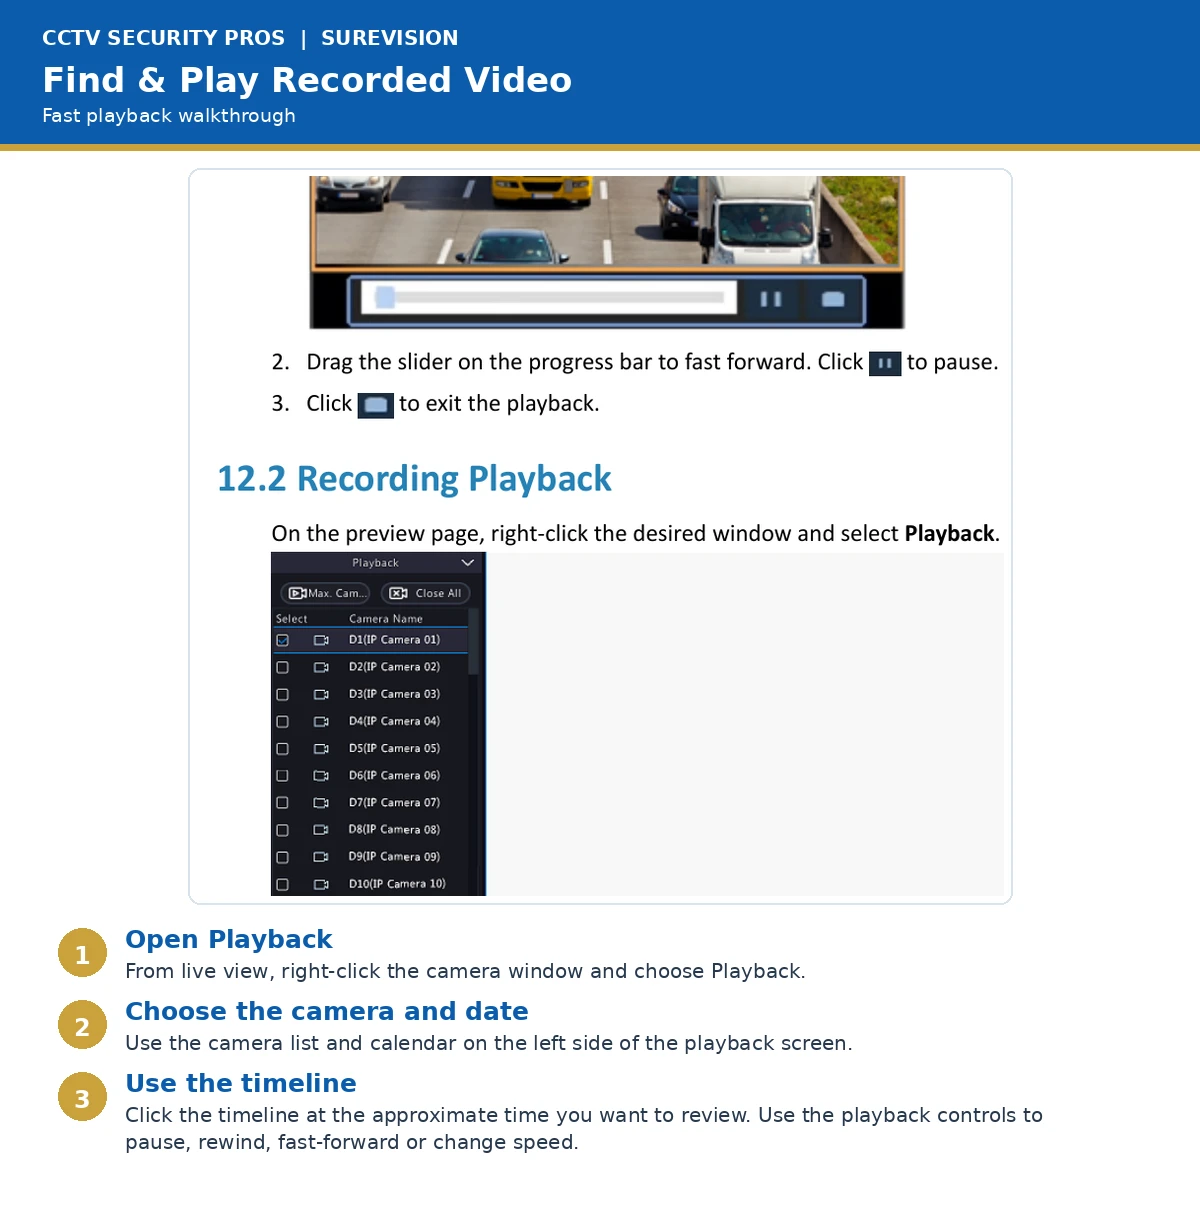
Find & Play Recorded Video
2. Select Playback.
3. Choose the camera and date.
4. Use the timeline to locate the approximate time.
5. Use Play, Pause, Rewind or Fast Forward as needed.
If live video works but recordings are missing, verify the recording schedule, recorder date/time and hard-drive status. Older video may also have been overwritten when storage became full.
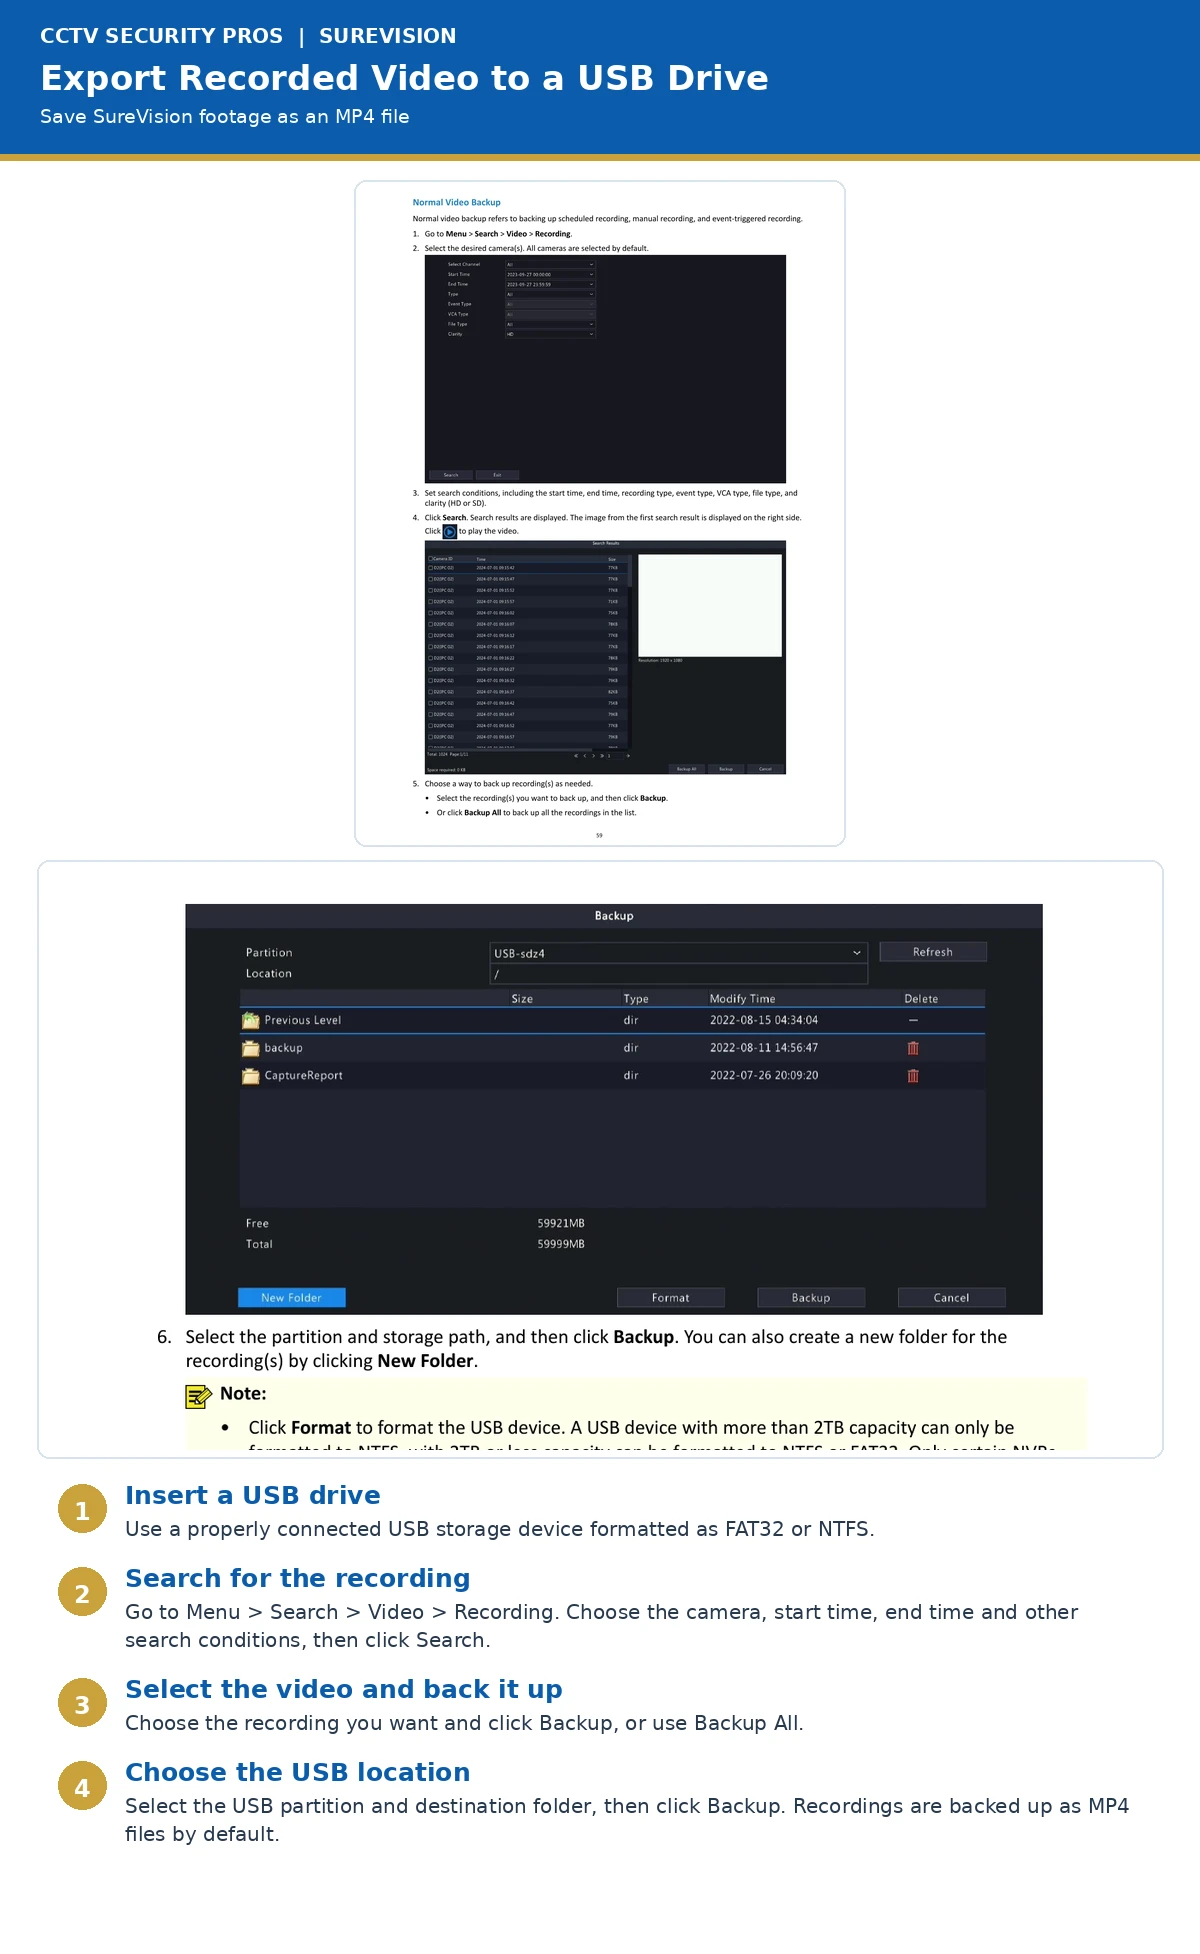
Export Security Camera Video to USB
2. Go to Menu → Search → Video → Recording.
3. Select the camera, start time and end time.
4. Select Search.
5. Select the required recording and choose Backup.
6. Choose the USB destination and start the backup.
SureVision recordings are backed up as MP4 files by default.
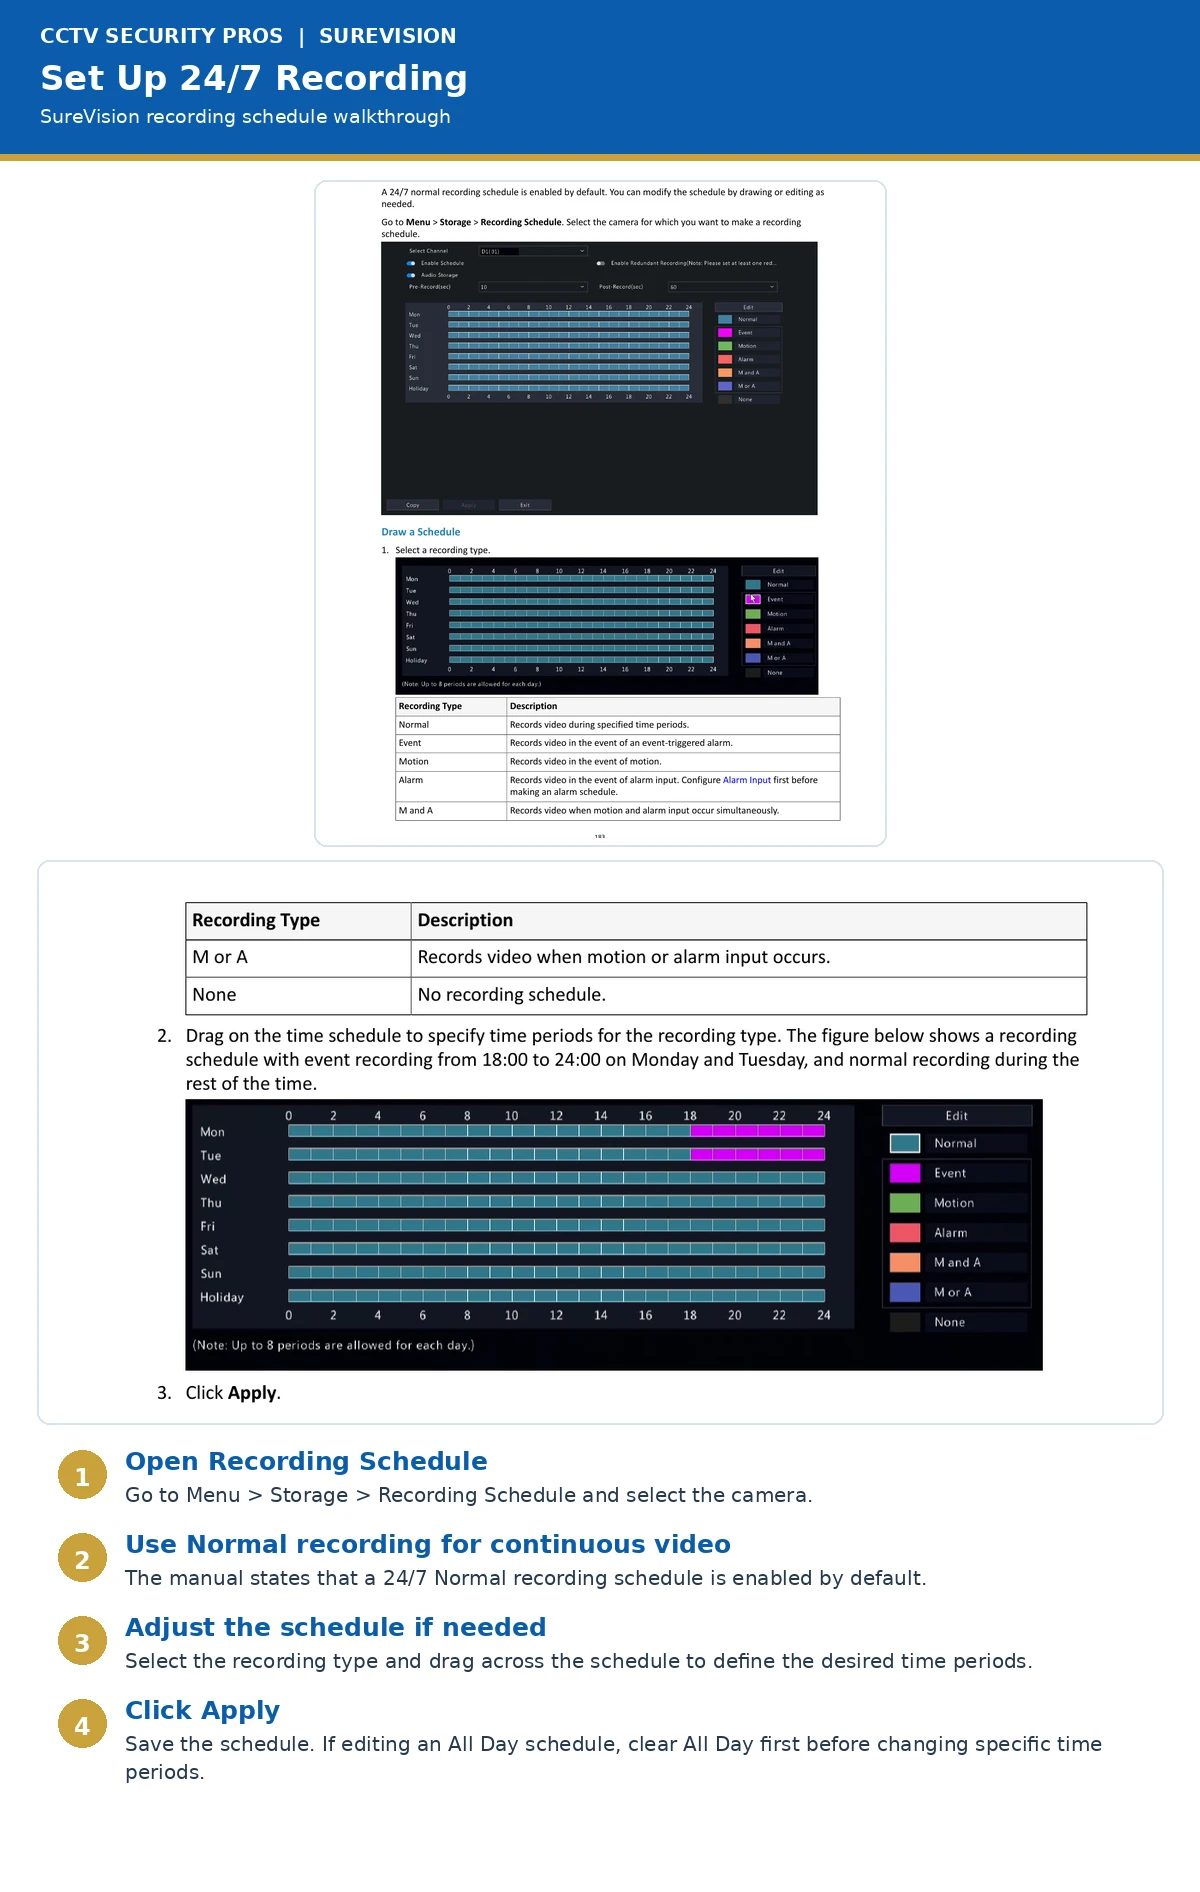
Set SureVision Cameras to Record 24/7
Go to: Menu → Storage → Recording Schedule.
Select the camera and review its schedule. SureVision NVRs normally use a continuous Normal recording schedule by default, but the schedule can be edited when needed.
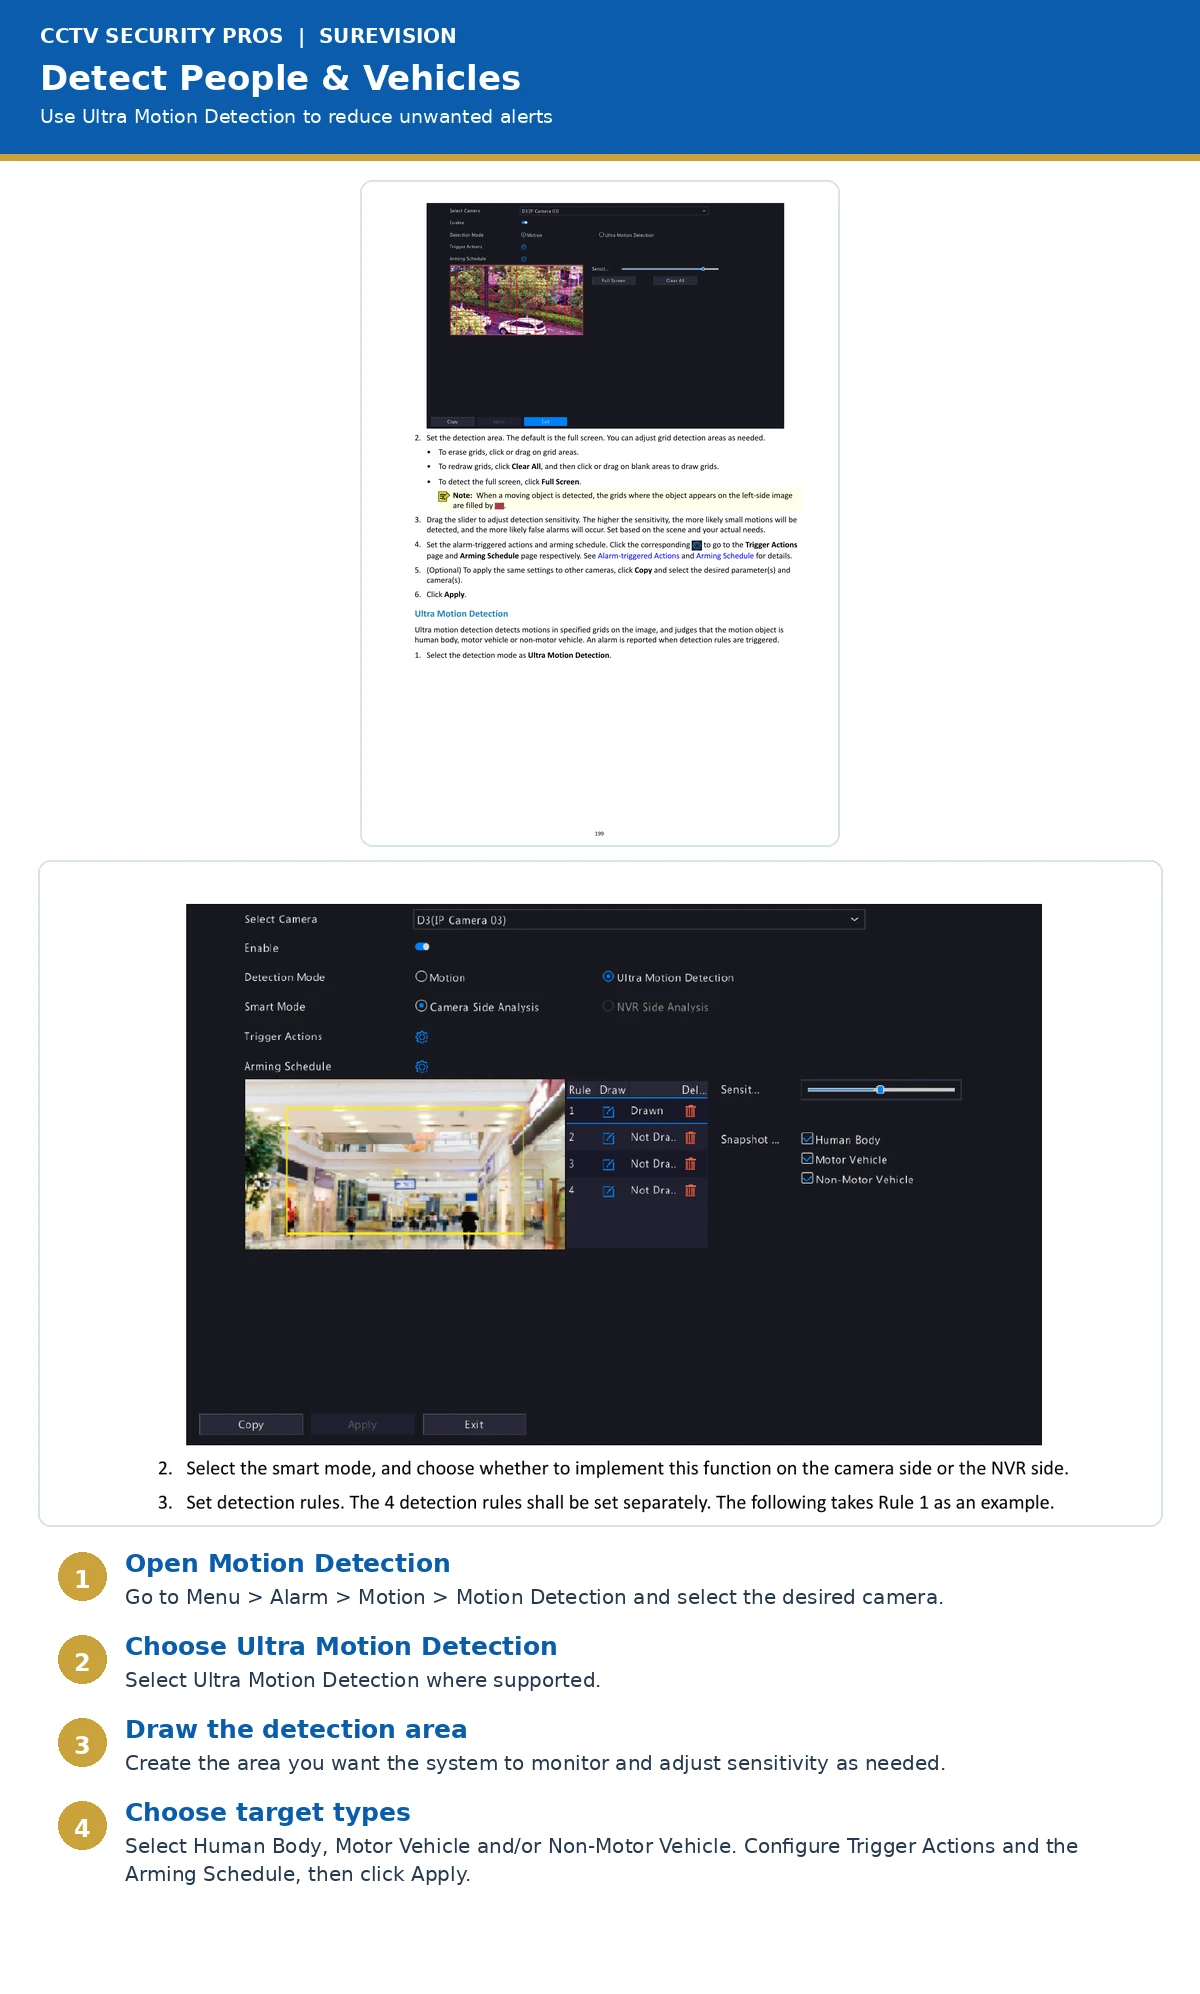
Motion, Human & Vehicle Detection
Standard Motion Detection
Go to Menu → Alarm → Motion → Motion Detection. Select the camera, enable detection, define the detection area, adjust sensitivity, set the schedule and choose the desired actions.
Human & Vehicle Detection
On supported cameras, use Ultra Motion Detection and select supported target types such as Human Body, Motor Vehicle or Non-Motor Vehicle. This can help reduce alerts caused by less important movement.
NVR, Monitor & Hard Drive Help
Check Hard Drive Status
Go to Menu → Maintenance → System Info → Disk. Review total capacity, free space, disk status and other drive information. If you need additional or replacement storage, see our security camera hard drives for NVRs and DVRs.
NVR Does Not Recognize the Hard Drive
• Shut down and disconnect power before checking the hard drive.
• Check and reseat the drive connection.
• Try another disk slot when applicable.
• Confirm that the disk is compatible with the recorder.
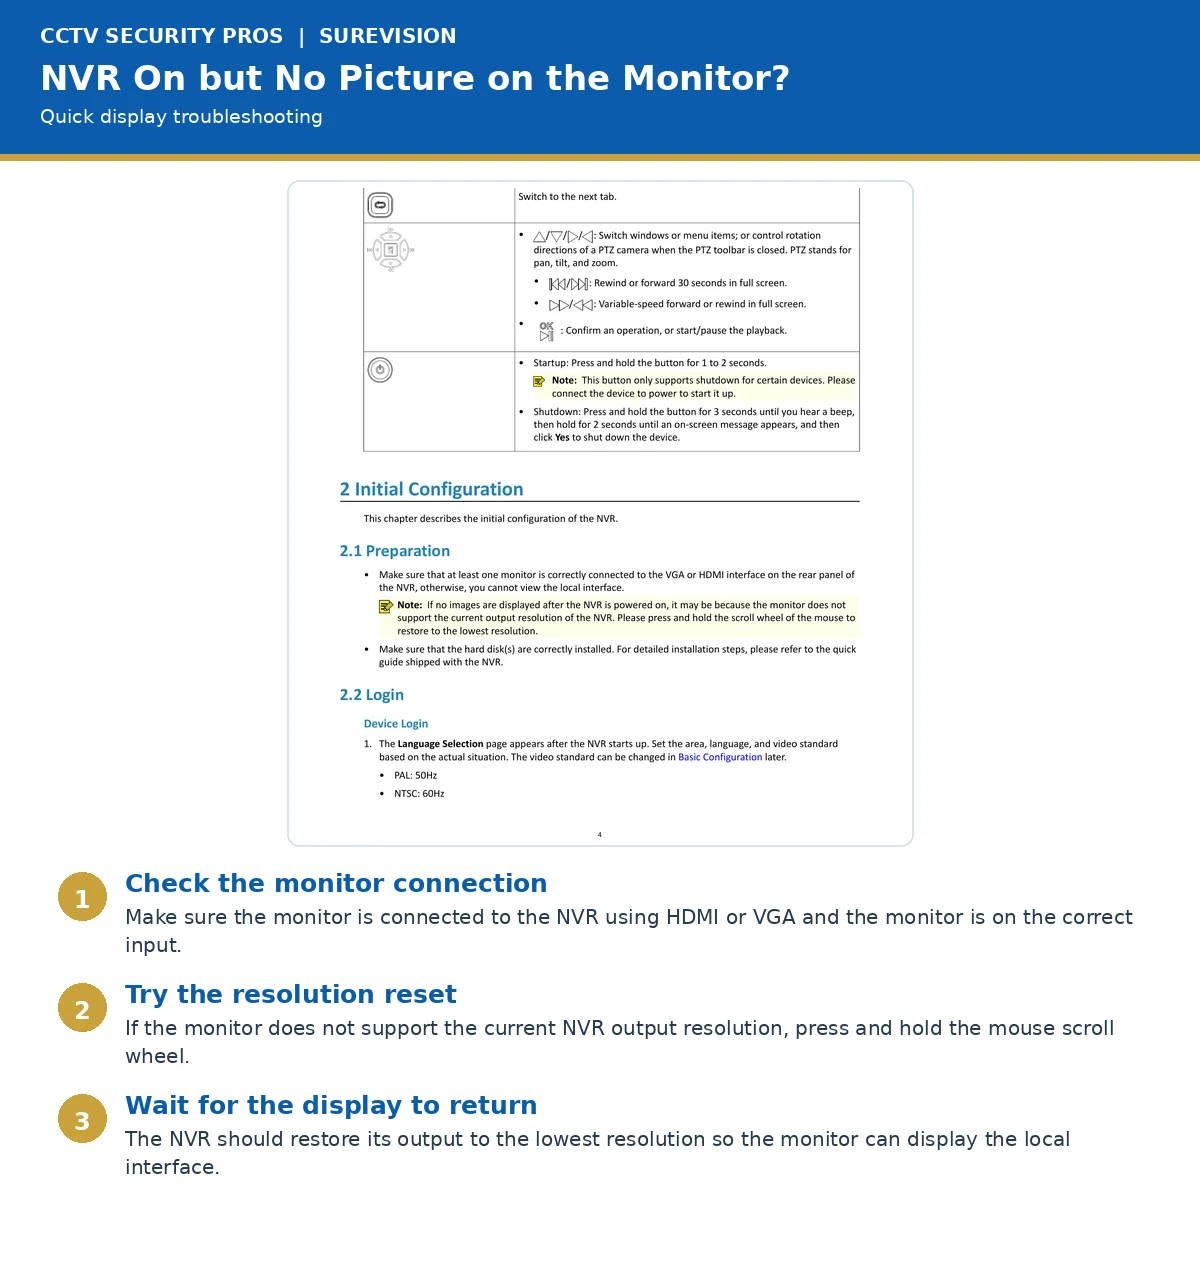
NVR Is On but the Monitor Has No Picture
Confirm the monitor is connected to the NVR's HDMI or VGA output and is set to the correct input.
Complete SureVision Support Library
Looking for additional cameras, a replacement recorder or a complete system? Browse current SureVision equipment below.
SureVision IP Security Cameras | SureVision NVR Recorders | SureVision Security Camera SystemsAlready Working With Technical Support?
If a CCTV Security Pros technician asks to remotely connect to your computer, open the TeamViewer support page.
Open TeamViewer Remote SupportStill Need SureVision Help?
If these self-service steps do not resolve the issue, return to the main Technical Support Center for additional troubleshooting, TeamViewer and live support options.
Main Technical Support Center Call 888-653-2288