
Vandal-Resistant Dome Cameras: A Practical Buying Guide
Posted by CCTV Security Pros on Oct 7, 2026
Choose a Dome Camera That Fits the Location
Vandal-resistant dome cameras can help protect the lens and discourage casual interference. Learn what the housing can do, what ratings mean for your selection and why the mounting and recorded view still matter.
Updated October 7, 2026 · CCTV Security Pros
Does vandal resistant mean unbreakable?
No. Vandal resistant is the more accurate description. A protective dome and rated housing can reduce vulnerability to certain impacts or interference, but a camera can still be damaged, covered or obstructed. Choose the housing, placement and overlapping views as parts of one design.
Understand the housing and its limits
A dome camera encloses the lens within a protective cover. Depending on the model, fasteners and housing design may make casual adjustment more difficult than with an exposed camera body. This can be useful at public entrances, shared corridors and other accessible positions.
Look for the exact model's documented impact and environmental ratings. Impact resistance and protection against water or dust describe different properties. Neither label means the camera can withstand any attack or every industrial condition.
Do not assume that all cameras with a dome shape offer the same protection. Compare specifications and installation requirements, including the mounting surface and compatible junction box.
Choose the lens before choosing the appearance
Housing style does not determine how far a camera can identify detail. Match the field of view to the task: a lobby overview needs different framing from a narrow doorway or distant gate. A higher-resolution image still spreads its pixels across whatever area the lens includes.
A fixed lens keeps selection simple when its viewing angle fits the location. A motorized or varifocal model may offer more flexibility when framing must be adjusted after installation. Confirm which controls the selected camera actually supports.
Check the dome under nighttime conditions
Inspect recorded video after dark as well as during the day. Dirt, scratches, moisture or reflections near the dome can reduce the useful image. A camera that looks clear when first unpacked can perform differently once installed near a wall, light fixture or reflective surface.
Follow the manufacturer's assembly and cleaning instructions. Keep the cover clean with approved materials, and avoid treating abrasion resistance as permission to use harsh cleaning methods. Check the image again after maintenance.
Protect the installation as a whole
Mount the camera on a suitable stable surface with appropriate hardware. Protect connectors and cable entries, and ensure the chosen location fits the published operating conditions. A rated camera with an exposed connection is not a complete weather-resistant installation.
Where deliberate interference is a concern, consider another camera that provides context around the mounting location. Keep the recorder secure and review available tamper or obstruction alerts for the actual equipment. Such alerts depend on model support and configuration.
Balance reach and image quality: mounting a camera very high can make physical access harder but create a steep view that reduces useful facial detail. Test the position before final installation.
Match the camera to the recorder
For an IP dome camera, confirm recorder compatibility, supported resolution, recording bandwidth and the required power source. Check the exact analytics, audio and playback functions you expect; a basic video connection does not establish that every feature will work across mixed equipment.
Use the camera's actual recording settings to estimate NVR storage. Review a moving subject, test exports and verify the recording history after installation. Physical durability is valuable only when the system also captures useful footage.
Your planning priorities
SureVision dome cameras to compare
These products are available from CCTV Security Pros. Match each model to the viewing task and confirm the final recorder, power, mounting and storage configuration before ordering.
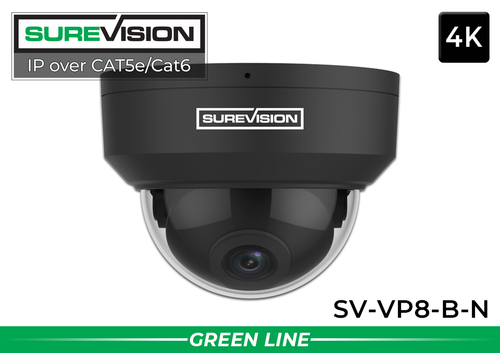
SureVision SV-VP8-B-N 4K Black Vandal Dome IP Camera
This 8MP vandal-resistant dome is a practical candidate for suitable entrances and common areas. Compare its lens, mounting and environmental specifications with the planned position and your recorder.
View product details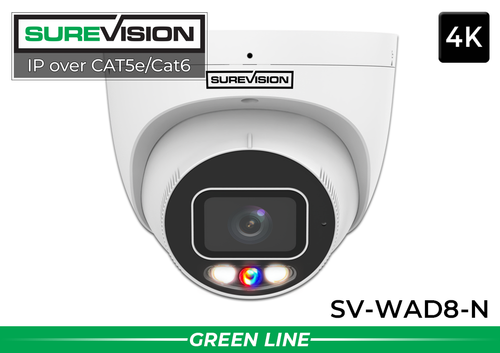
SureVision SV-WAD8-N 4K Dual-Light Dome IP Camera
This 8MP dome offers a 2.8mm wide-angle view, dual-light illumination and built-in microphone and speaker. Consider it where those functions suit the site, and configure lighting and audio deliberately for the property's operating requirements.
View product detailsVandal-resistant dome camera questions
Can a vandal-resistant camera be damaged?
Yes. Its housing can improve resistance to certain impacts, but it is not indestructible. It may also be covered or obstructed without the housing being broken.
Are dome cameras better than bullets?
The better choice depends on the task. Dome housings can suit accessible public areas, while bullet cameras may be convenient for other mounting arrangements. Lens, lighting and placement are more useful comparisons than shape alone.
Can a scratched cover affect the recording?
Yes. Inspect the image after cleaning or damage and follow the manufacturer's instructions for service or replacement. Do not assume a camera is performing correctly just because it remains online.
Find the Right Dome Camera for Your Site
Tell CCTV Security Pros where the camera will be mounted, the detail you need and the recorder you plan to use. Our team can help match the housing, lens and accessories to the location.
Get a Free System Quote Shop SureVision CamerasCompare the complete installation, not just the dome cover
A vandal-resistant housing works as part of an installation. The camera, bracket, fasteners and cable entry all need to suit the mounting surface and environment. A strong cover provides little benefit if the cable connector is exposed or the bracket is attached to an unsuitable surface. Keep service access in mind so cleaning and inspection remain practical.
| Item | What to compare | Why it matters |
|---|---|---|
| Housing | The exact model’s stated impact and weather ratings | Different ratings describe different tests. |
| Lens | Required subject distance and field of view | A discreet housing cannot compensate for an unsuitable lens. |
| Mounting | Compatible bracket, cable protection and surface | The assembly must hold its intended view. |
| Night image | Reflections, cleanliness and nearby surfaces | Light reflected into the dome can reduce usable detail. |
Our dome-versus-bullet camera guide compares the two shapes in context. Browse SureVision IP cameras with the intended viewing task in mind, then confirm the model’s particular specifications.
Check the recorded image after closing the housing
Set the viewing direction and focus where applicable, then complete the housing assembly before the final test. Remove protective film according to the installation instructions and avoid fingerprints on optical surfaces. A view that looked clear with the cover removed can change once infrared light reflects from a dirty cover or a nearby obstruction.
Test with the lights at their normal nighttime level. Have someone move through the important part of the scene and review saved footage. Watch for a bright halo, reflected infrared light, glare from signs and a subject that becomes too small near the edge of the view. Adjust the installation using the manufacturer’s instructions, then repeat the same test.
Keep a simple baseline image and a cleaning record. When the picture changes later, compare it with the baseline before changing unrelated recorder settings. The technical support center can help locate setup guidance, while the 4K resolution guide explains why scene detail still depends on distance and framing.
What to record at the final system check
Keep the acceptance check simple enough that the owner can repeat it later. Use the final camera positions and recording settings, and include the lighting and activity that make the important views difficult. A recorded test gives a useful baseline for future troubleshooting.
- Confirm that each camera name matches its actual location and purpose.
- Review a saved daytime event and, where relevant, a nighttime event with a moving subject.
- Check the recording history against the agreed retention goal after a representative operating period.
- Test the permissions and playback functions of an ordinary user account.
- Export a short sample and check it on the device that will be used for review.
- Record any unresolved issue and the person responsible for correcting it.
Repeat the relevant checks after a camera is moved, a major display or obstruction changes, or recording settings are adjusted. This keeps the system aligned with the property’s current needs and makes maintenance more predictable.
Turn the plan into a complete equipment list
After defining the required views, compare SureVision IP cameras. Match each camera to a recorder channel, a compatible power connection and a documented cable route. Keep the installation materials, storage assumptions and required user functions on the same list so a missing component is easier to spot before ordering.
Use our dome-versus-bullet guide for the next planning decision and the outdoor camera guide for the related technical detail. These guides provide background for comparing the actual equipment rather than choosing solely by a camera count or a resolution label.
Bring the list together in the custom security camera system builder, or send the property layout and viewing goals with a free system quote request. Include the mounting locations, approximate subject distances and any existing equipment you want to keep. That information makes the proposed configuration more specific to the property.
Before accepting the installation, practice the tasks the owner will perform: checking a live view, finding a recorded event and preserving a usable export. Save the camera schedule, equipment model numbers and support information with the project records. Use the technical support center for model-specific setup resources and ask for help when a required function needs clarification.