
Security Camera Placement Guide for Homes and Business
Posted by Gregory Derouanna, MBA on Mar 6, 2026
Security Camera Placement Guide for Homes and Businesses
Proper security camera placement can be just as important as the camera itself. The goal is not simply to see an area—it is to capture useful video of entrances, people, vehicles and activity while reducing blind spots and avoiding common lighting problems.
This guide explains where to position security cameras around homes and businesses and how camera location, mounting height, field of view and nighttime testing affect a complete security camera system.
The Most Important Placement Rule
Decide what each camera needs to accomplish before mounting it. An overview camera, facial-identification view, register camera, driveway camera and license-plate camera have different jobs. Trying to make one very wide camera capture every detail across a large scene is one of the most common surveillance design mistakes.
Best Security Camera Placement for Homes
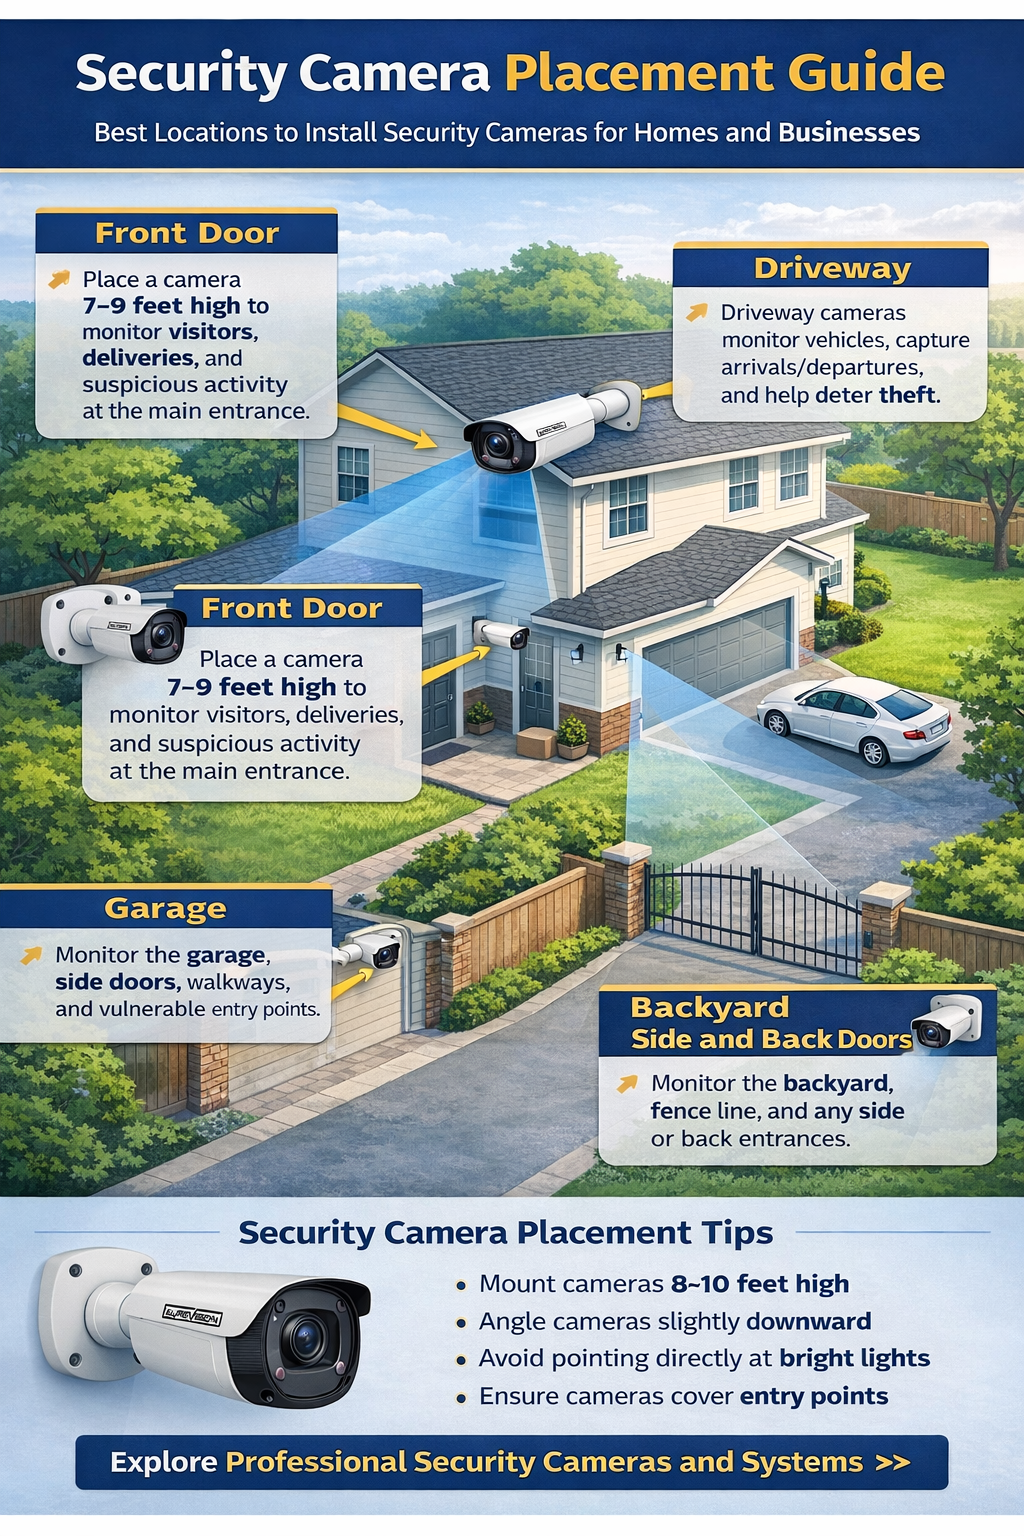
Residential camera placement should prioritize the routes people actually use to approach and enter the property. Front and rear doors, driveways, garages, side gates and backyard access are usually more valuable than simply placing cameras at evenly spaced points around the building.
Front Door and Main Entrance
Position the front entrance camera so a visitor's face occupies a useful portion of the image as they approach or stand at the door. Avoid an extremely high angle that shows mostly the top of a person's head.
Driveway and Garage
A driveway camera should document vehicles and people approaching the home. Choose the field of view based on driveway width, distance and the detail you want to capture rather than relying on one lens size for every property.
Backyard, Side Yard and Gates
Back doors, fence gates and side passages can receive less natural observation than the front of a property. Position cameras so people entering these areas move through the useful portion of the image rather than appearing only at the far edge of the frame.
Side Doors and Secondary Entrances
Detached garages, side doors and other secondary entrances deserve dedicated coverage when they provide another route into the property or contain valuable equipment.
Best Security Camera Placement for Businesses
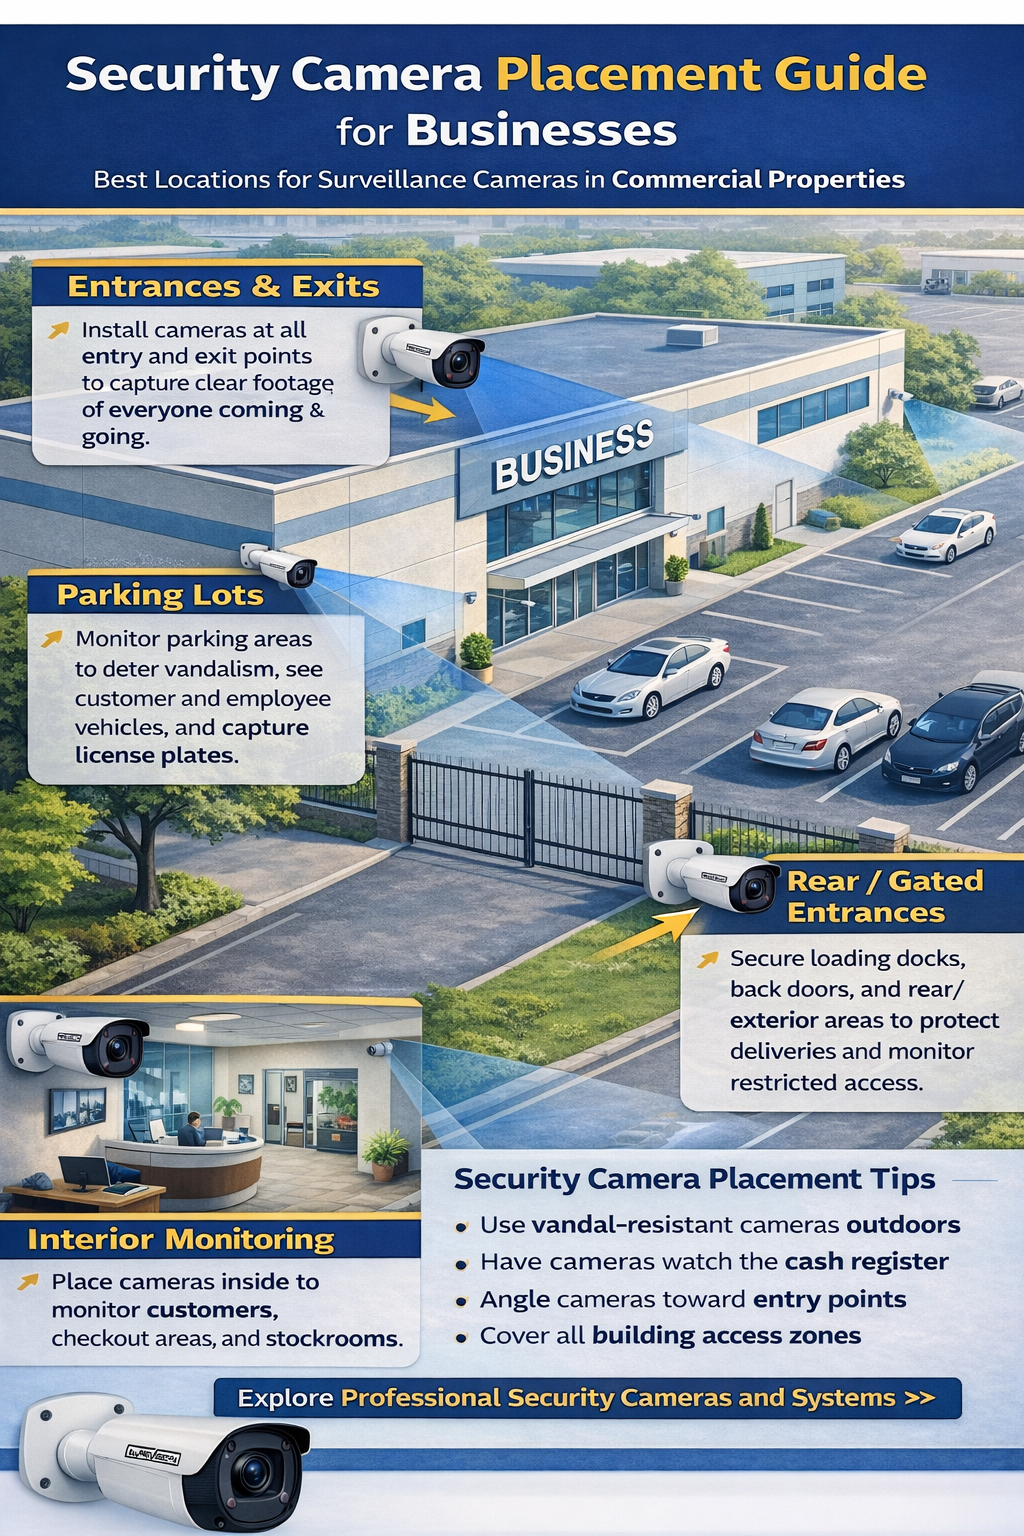
Commercial properties often need multiple layers of coverage: identification at entrances, overview footage in common areas, transaction or inventory views indoors, and exterior surveillance around parking lots, loading areas and perimeter access points.
Capture useful facial detail at customer, employee and other important access points.
Use dedicated views where hands, merchandise and transaction activity need documentation.
Cover pedestrian routes, vehicle approaches and higher-risk portions of the lot.
Monitor dock doors, staging areas, deliveries and employee access.
Retail Stores
Prioritize customer entrances, registers, high-value merchandise, stockrooms and rear doors. Use overview cameras for general activity and closer dedicated views where identification or transaction detail matters.
Offices
Common locations include reception, building entrances, hallways, server or storage rooms and parking areas. Avoid areas where people reasonably expect privacy.
Warehouses
Loading docks, shipping and receiving, inventory aisles, exterior yards, employee entrances and parking areas are common priorities. Large distances may require different lenses or specialized cameras instead of simply adding more wide-angle cameras.
How High Should Security Cameras Be Mounted?
There is no single mounting height that is correct for every camera. Many general-purpose installations place cameras high enough to discourage easy tampering while still preserving a useful viewing angle. The correct height depends on camera location, lens, distance and the identification detail required.
A common mistake is mounting cameras unnecessarily high. A very steep downward angle may show a large area but provide less useful facial detail. Before permanently mounting a camera, test the intended view at approximately the planned height.
Field of View: Avoid Trying to See Too Much
Wide-angle views are excellent for situational awareness, but the wider the scene, the fewer pixels are generally available for a particular face, vehicle or object within that scene. Use wide views for overview coverage and narrower or varifocal views where identification at distance is important.
For a gate, driveway, loading dock or other controlled approach, it can be better to dedicate a camera to the target area rather than relying entirely on a broad overview camera.
Night Vision Placement: Test Cameras After Dark
A camera view that looks excellent during the day can perform very differently at night. Infrared light can reflect from walls, soffits, gutters, glass, signs and other nearby surfaces. Headlights and bright exterior lighting can also affect the image.
- Keep nearby walls and reflective surfaces from dominating the camera's night view.
- Avoid aiming directly into strong lights when possible.
- Check whether landscaping blocks the camera or reflects infrared illumination.
- Test exterior views after dark, not only during installation in daylight.
- Adjust the camera angle if headlights or other lighting consistently obscure the target area.
How to Reduce Security Camera Blind Spots
Blind spots are best addressed during planning. Walk the property and identify every important route into and through the monitored area. Camera views can overlap at critical locations, but more cameras are not automatically better. Each camera should have a defined purpose.
Pay particular attention to corners, recessed doors, areas behind landscaping, loading structures, parked vehicles and changes in elevation that can block a camera's line of sight.
Common Security Camera Placement Mistakes
- Mounting too high and losing useful facial detail.
- Using one overly wide view where identification is actually needed.
- Ignoring nighttime conditions until after an incident occurs.
- Pointing through glass at night, which can cause reflections and infrared problems.
- Letting trees or landscaping grow into the view.
- Ignoring backlighting at bright entrances and doorways.
- Failing to protect outdoor cable connections from weather and tampering.
Choose Camera Types Around the Location
Placement and camera selection should be planned together. Bullet cameras can work well along exteriors and long approaches. Dome or turret cameras are common in offices, retail spaces and entrances. PTZ cameras can add controllable optical zoom across large yards or lots, while specialized LPR cameras are designed for plate-capture applications.
Browse professional security cameras to compare camera styles, or see our best security cameras for business guide for commercial recommendations.
Plan the Complete Security Camera System
Camera placement is only one part of system design. Also consider cable routing, recorder location, available NVR channels, video storage, remote access and future expansion. A well-designed system leaves room to add cameras later without replacing the core recorder unnecessarily.
For a complete setup, compare professional security camera systems, IP PoE security camera systems and SureVision NVR recorders.
Security Camera Placement FAQ
Continue Planning Your Camera System
How to Install a Wired Security Camera System
Start With the Right Cameras and System
Good placement starts with cameras selected for the distance, lighting and detail required at each location. Build your system around the property rather than forcing one camera type to do every job.
Shop Security Cameras Shop Security Camera Systems